How to Winterize Windows and Doors for a Warmer Home
Winterizing your home is all about stopping heat from escaping. The main culprits? Gaps around your windows and doors. The process is pretty straightforward: you inspect for air leaks, seal them up with caulk or weatherstripping, and maybe even add temporary solutions like insulation film.
Taking these steps is one of the smartest things you can do to make your home more comfortable and seriously cut down on your energy bills this winter.
Why Winterizing Is Your Best Defense Against High Bills

Before you even pick up a caulk gun, it helps to understand why this annual task is so powerful. It's way more than just another chore on your to-do list; it's a smart investment in your home's efficiency. Even the smallest, most invisible gaps around your windows and doors act like open highways for heat loss.
Think of those tiny cracks as open invitations for that frigid Upstate South Carolina air to sneak inside. When that happens, your heating system has to work overtime just to keep the thermostat happy, and that extra effort shows up directly on your monthly utility bills.
The Real Impact of Air Leaks
It’s shocking, but even a small quarter-inch gap around a single door can let in as much cold air as leaving a small window wide open. Now, multiply that effect by every single window and door in your home, and the cumulative heat loss is massive. Sealing these leaks isn't just about feeling cozier—it's about taking back control of your home's energy performance.
This is why winterization has become such a critical part of home maintenance. Modern solutions have come a long way, too. For instance, upgrading to low-emissivity (low-E) double-pane glass can slash heat loss through your windows by up to 30-40% during the winter. It's a game-changer.
To give you a clearer picture, here’s a quick breakdown of how these small fixes can make a huge difference.
Winterization Impact At a Glance
| Gaps around window frames | 10-20% | Reduces drafts, lowers heating costs |
| Worn door weatherstripping | 10-15% | Stops cold air at the source, improves comfort |
| Unsealed attic hatch/door | Up to 10% | Prevents "chimney effect" heat loss |
| Cracks in exterior siding | 5-10% | Blocks wind, protects insulation |
As you can see, these aren't minor issues. They add up quickly, but thankfully, the solutions are often simple and deliver immediate results.
Beyond Windows and Doors
For a truly efficient home, you have to look at the entire building envelope. While windows and doors are the most obvious weak spots, other areas can bleed just as much heat. A home's first line of defense is its exterior. Our guide on the best siding for cold climates shows how properly insulated siding works hand-in-hand with your winterization efforts.
And don't stop there. To really lock in those energy savings, think about other entry points. Learning how to winterize your garage door is another great step toward creating a fully sealed and efficient home.
Key Takeaway: Winterizing your home isn't just about stopping drafts. It's a proactive strategy to reduce energy waste, lower your heating costs, and create a more comfortable living environment all season long. A few hours of work can deliver savings that last the entire winter.
Your Pre-Winter Draft Detective Toolkit
Before you can plug a single draft, you have to find it. Think of yourself as a detective, because cold air is sneaky, and a good old-fashioned inspection is your secret weapon. The goal here is to create a prioritized 'hit list' of every single drafty culprit in your home.
The good news? This doesn't require any expensive equipment—just a bit of your time and a few clever tricks.
Start by doing a systematic walkthrough. Check every window and door by running your hand along the edges of the frames, sashes, and thresholds. If you feel a noticeable temperature drop or an actual breeze, you’ve found a problem area. Make a note of it.
Simple Tricks to Pinpoint Hidden Air Leaks
Sometimes a draft is too subtle to feel with your hand. For those less obvious leaks, a visual test works wonders. My personal favorite is the incense stick test.
Just light an incense stick on a slightly windy day and hold it near the edges of your windows and doors. Watch that trail of smoke. If it wavers, dances, or gets sucked into a gap, you’ve pinpointed exactly where the air is getting in. It’s simple, but it’s incredibly effective.
For doors, there's another great method: the paper test. Close an exterior door on a single sheet of paper, right over the weatherstripping. If you can pull the paper out without any resistance at all, your seal isn't tight enough. That weatherstripping needs to be replaced.
Pro Tip: Don't just check the obvious spots. I've seen major heat loss come from overlooked areas like the trim where it meets the wall, mail slots, and even pet doors. Add those to your inspection list.
Once you’ve identified all the problem areas, make a detailed list. Be specific. Note the location and the issue (e.g., "kitchen window, draft at bottom sash," or "front door, worn weatherstripping at hinge side"). This list is now your action plan.
Assembling Your Weekend Warrior Toolkit
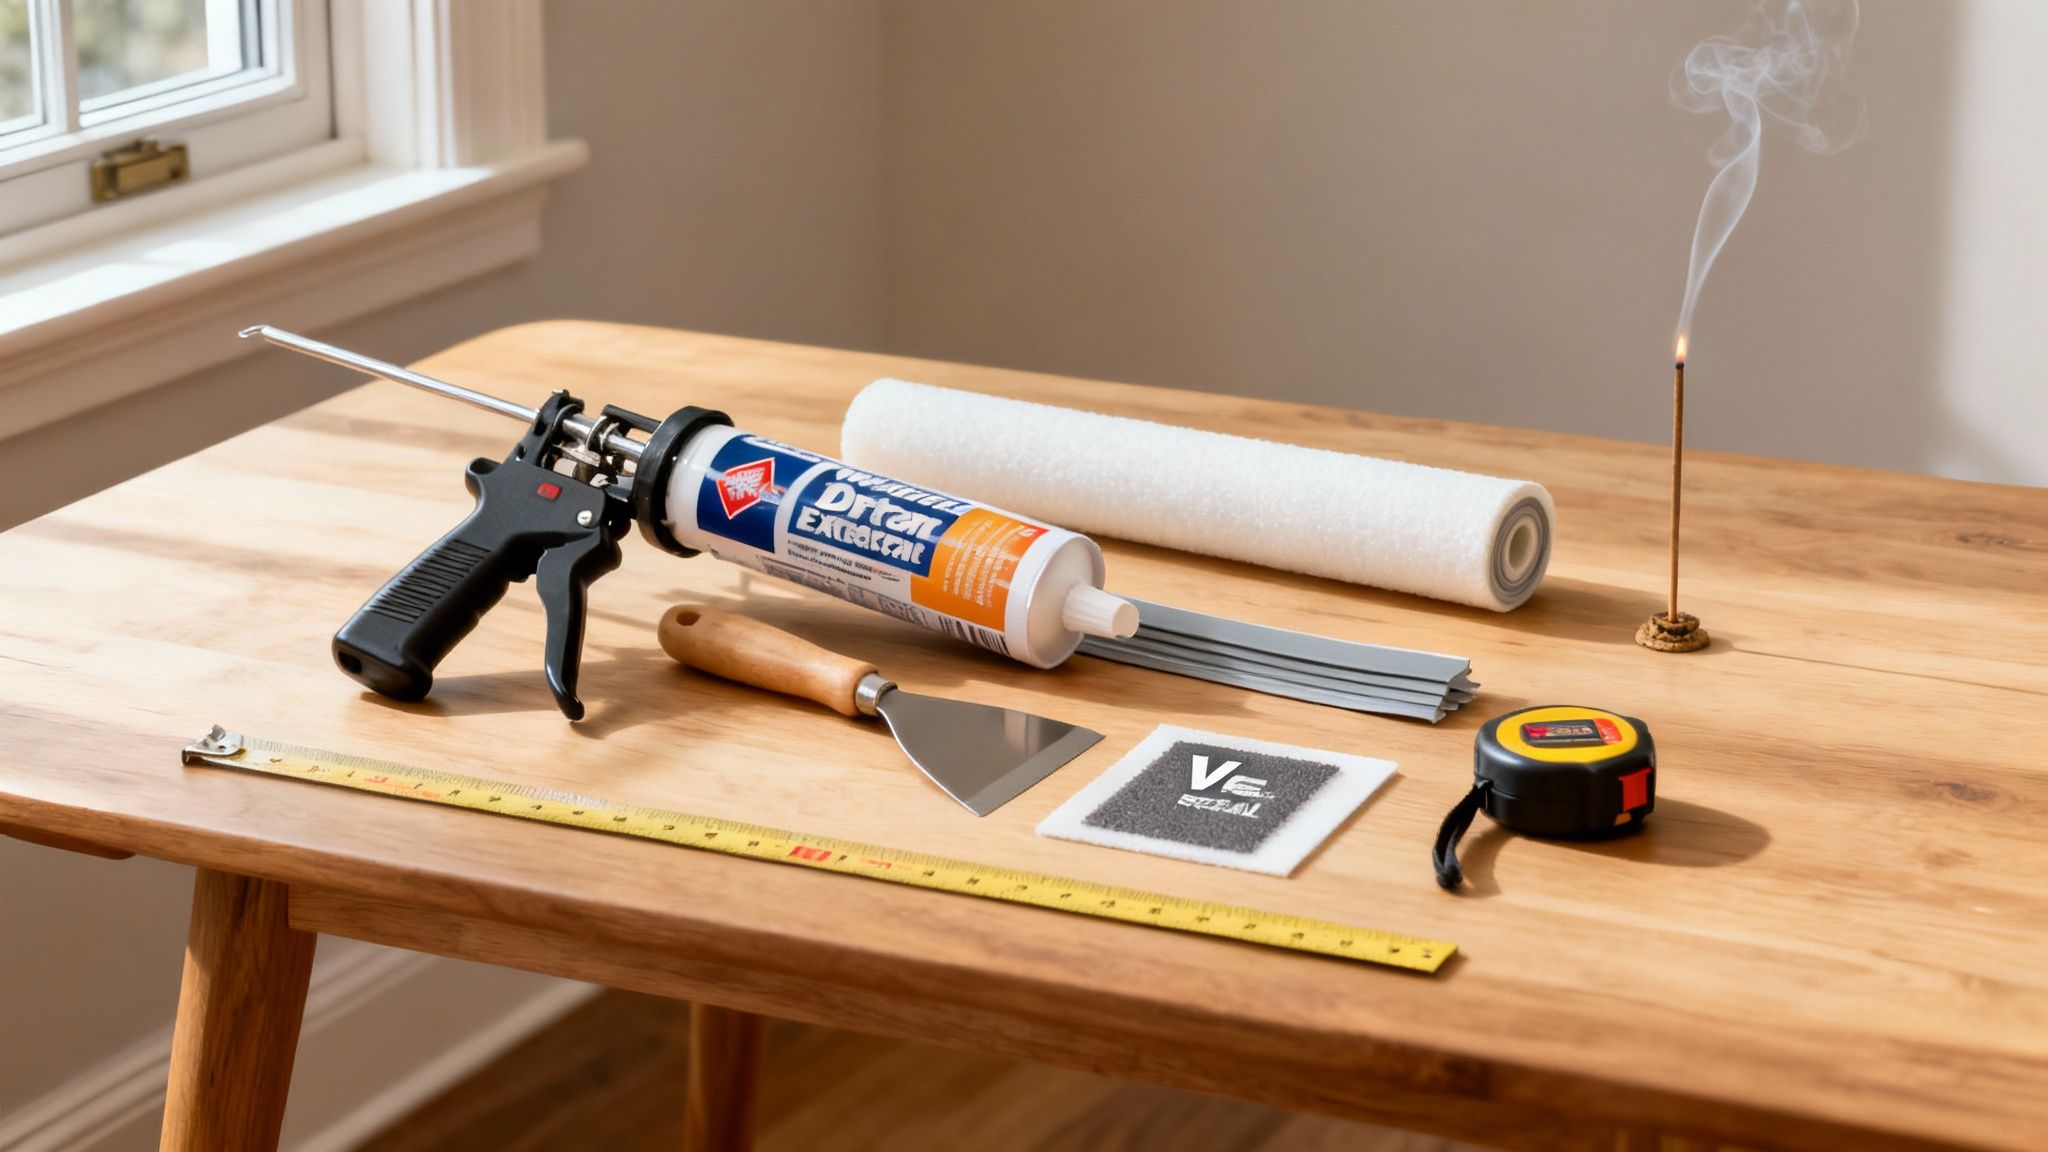
With your hit list in hand, it’s time to gather your supplies. Having everything ready before you start makes the whole job faster and a lot less frustrating. This isn’t a random shopping list; each of these items has a very specific job in your mission to winterize.
Here’s a rundown of what you'll want to have on hand:
- Exterior-Grade Caulk & Caulk Gun: This is for sealing stationary gaps around the outside of your window and door frames. Make sure you get a silicone or polyurethane-based caulk—it stays flexible in the cold and stands up to moisture.
- Weatherstripping: You've got options here, but for DIYers, V-seal (tension seal) and foam tape are fantastic choices for the moving parts, like window sashes and door jambs.
- Putty Knife or Scraper: A flexible metal putty knife is your best friend. It’s perfect for scraping away old, cracked caulk or peeling weatherstripping without gouging your frames.
- Tape Measure: Don't eyeball it. A tape measure is essential for cutting weatherstripping to the perfect length for a tight, professional-looking seal.
- Utility Knife & Scissors: You'll need these for cleanly snipping the tip of your caulk tube and trimming weatherstripping for a snug fit.
- Cleaning Supplies: This one is critical. Rags, soap and water, or even some rubbing alcohol are non-negotiable. You have to clean every surface before applying new caulk or adhesive weatherstripping. If you don't, it simply won't stick, and you'll be doing this all over again next year.
Having these tools ready means you can tackle your entire list in one go, setting yourself up for a warmer, more energy-efficient home all winter.
Alright, you've done your draft detective work and gathered your tools. Now for the fun part—actually stopping those leaks. This is where you’ll feel the biggest, most immediate difference in your home’s comfort and see a real drop in your energy bills.
Sealing up air leaks with caulk and weatherstripping is the heart and soul of winterizing your windows and doors.
It might seem like a big job, but it all comes down to a simple rule of thumb: caulk is for the stationary gaps, and weatherstripping is for the moving parts. Get that right, and you're halfway there.
Applying Caulk Like a Pro
Caulking is all about creating a seamless, airtight seal where two things that don't move meet—think the outside trim of a window frame against your siding. A clean, smooth bead of caulk doesn’t just look a heck of a lot better; it works better, too.
First things first: prep work is everything. You absolutely have to get rid of any old, cracked, or peeling caulk with a putty knife. After that, give the area a thorough cleaning with soap and water (or rubbing alcohol for stubborn grime) to make sure the new caulk has something clean to stick to. This is a non-negotiable step for a seal that actually lasts.
My Favorite Pro Tip: On a chilly day, caulk can be stiff and a real pain to work with. I always toss the tube in a bucket of warm water for about 10-15 minutes before I start. It's a simple trick, but it makes the caulk flow so much more smoothly, giving you way better control and a cleaner line.
Once everything is clean and dry, you’re ready to go. Just follow this simple process:
Cut the Tip: Snip the nozzle of the caulk tube at a 45-degree angle. Start small—about 1/8 inch is a good starting point. You can always make the hole bigger, but you can’t make it smaller.
Apply Even Pressure: Hold your caulk gun at a 45-degree angle to the seam. Squeeze the trigger with steady, consistent pressure as you move along the gap. The goal here is to push the caulk into the gap, not just lay it on top like frosting.
Smooth the Bead: Right after you lay down a section, run a wet fingertip or a caulk finishing tool over the bead. This little step forces the caulk deep into the gap for a top-notch seal and gives it that clean, professional look.
Demystifying Weatherstripping
Weatherstripping is your go-to for sealing the parts of your windows and doors that are meant to move. Its job is to create a soft, compressible seal that blocks drafts when everything is shut but still lets you open and close things without a fight.
Picking the right kind is crucial. For most of us doing this at home, two types are clear winners for being effective and easy to put on:
- Foam Tape: This is basically a self-adhesive foam strip on a roll. It’s fantastic for squishing into irregular gaps and is incredibly simple to install. Just cut it to size, peel the back off, and press it firmly into place along a door jamb or on the bottom of a window sash.
- V-Seal (Tension Seal): This is a tough plastic or metal strip folded into a "V" shape. When a window or door closes on it, the "V" compresses and forms a really tight seal. It's a great, long-lasting option for the side channels of old double-hung windows.
Just like with caulking, you have to start with a perfectly clean and dry surface when you’re installing any weatherstripping with an adhesive back. Any bit of dust will keep it from sticking properly. And remember the old saying: measure twice, cut once. You want a snug fit from end to end with no gaps.
Did you know that swinging doors and windows make up about 60% of applications? These are the spots where weatherstripping makes the biggest impact, often sealing up to 15% of drafts on its own. Even classic double-hung windows, which are great for airflow, are a huge source of energy loss without these simple upgrades.
Ultimately, if you're constantly fighting drafts from old, worn-out frames, a full window replacement might be the best long-term play. Learning more about modern, energy-efficient windows can help you figure out if it's the right move for your home.
Quick Fixes vs. Permanent Upgrades: What's Right for You?
When it comes to winterizing your windows and doors, you’re basically looking at two paths: the quick, get-it-done-now approach, or the more permanent, long-term solution. The right choice really boils down to your budget, how much time you have, and whether you’re planning to stay in your home for the long haul.
Not every drafty corner demands a full-blown renovation. Sometimes, a simple and temporary fix is exactly what you need.
If you're renting or just need an immediate, low-cost way to stop a draft, temporary options are your best friend. Think of things like plastic window insulation film, which cleverly creates an insulating pocket of air, or even a simple draft stopper you can slide under a door. These fixes won't break the bank, you can do them in an afternoon, and they come off easily once spring rolls around.
This little decision tree is a great visual for figuring out the best immediate fix for the most common leaks you'll find.

As you can see, the logic is pretty straightforward. If you can actually see daylight through a gap, caulk is the way to go. If it's a draft you feel but can't see, weatherstripping is what you need.
Diving Into Permanent Solutions
On the other side of the coin, you have permanent upgrades. These are the real investments in your home's comfort and long-term energy efficiency. We're talking about things like installing a high-performance storm door or replacing old, cracked weatherstripping with durable V-seal strips. They go right to the root of the problem.
Yes, they cost more upfront and take a bit more work, but they pay you back for years to come in savings and comfort.
Of course, the biggest permanent upgrade of all is replacing your old windows. Modern windows are marvels of efficiency. For instance, low-emissivity (low-E) double-pane glass can block up to 70% of radiant heat transfer. That's a huge deal for your energy bills and something that's been proven time and again in even the most demanding commercial buildings.
Key Insight: A temporary fix gets you through the winter. A permanent upgrade solves the problem for good, almost always leading to greater energy savings and a much better return on your investment over time.
Comparing Winterization Solutions
To make the decision a bit easier, it helps to see these options side-by-side. Here’s a quick breakdown of how temporary fixes stack up against permanent upgrades in terms of cost, effort, and what you can expect from them long-term.
| Window Insulation Film | $10 - $20 per kit | Low | High (for one season) |
| Draft Stoppers | $10 - $30 each | Very Low | Moderate (seasonal use) |
| Caulking | $5 - $15 per tube | Low to Moderate | High (1-5 years) |
| Weatherstripping | $10 - $40 per roll | Moderate | High (1-10+ years) |
| Storm Windows/Doors | $200 - $600+ | Moderate to High | Very High (decades) |
| Window Replacement | $600 - $2,100+ per window | High (Pro Install) | Excellent (20+ years) |
This table shows there’s a solution for every budget and skill level. Your choice depends on whether you need a quick patch for this year or a lasting fix for the next twenty.
Making the Final Call for Your Home
So, what’s the right move? It all comes down to your specific situation. If you’ve got a few minor drafts and you're watching your budget, a smart combination of temporary fixes can make a world of difference.
However, if your windows are ancient, single-pane, or you’re seeing moisture trapped between the glass, it’s probably time to think about a more permanent fix. For homeowners who are serious about slashing energy bills for good, investing in new, high-quality installations is almost always the most cost-effective strategy in the long run.
For a deeper dive into long-term methods and products, check out these 8 Best Window Insulation Solutions for Winter. And if you think your current windows have seen better days, our guide on the best replacement windows for homes can help you explore your options for a lasting upgrade.
Advanced Strategies and When to Call a Professional
Once you’ve wrestled the most obvious drafts into submission, it’s time to play detective and hunt down the sneakiest energy vampires. Most people are shocked to learn just how much cold air seeps in through places they’d never even think to check. Moving beyond the window sash and door frame is where you’ll find some of the biggest gains.
Take a look at the electrical outlets and light switches on your exterior walls. Those little cutouts are basically tiny highways for cold air, bypassing your insulation completely. A simple, inexpensive foam gasket tucked behind the faceplate can stop this sneaky heat loss in its tracks. Another major culprit? The trim around your windows and doors. The tiny gap between the wood molding and the drywall might not look like much, but it can be a significant source of drafts. A thin bead of paintable acrylic latex caulk seals it up perfectly.
Beyond Sealing Gaps
Sometimes, making your home truly winter-ready isn't just about plugging leaks—it's about adding new layers of defense against the cold.
- Insulated Cellular Shades: These are way more than just window dressings. Their unique honeycomb design traps a pocket of air, creating a powerful insulating barrier against the cold glass. They can slash heat loss through your windows by 40% or more.
- Storm Doors and Windows: There's a reason these have been around forever—they work. Installing a high-quality storm door or a set of exterior storm windows adds another layer of insulation, dramatically cutting down on both drafts and heat transfer.
These next-level strategies help you winterize your home more thoroughly, taking your comfort and energy savings to a whole new level.
Key Insight: Real winterization is about creating a complete thermal envelope. It’s not just about the obvious gaps. When you seal hidden leaks in outlets and add insulating layers like cellular shades, you're treating the whole system, not just patching the parts you can easily see.
Knowing When to Call a Professional
DIY winterizing is a fantastic way to tackle common issues, but some problems are giant red flags telling you that you’re dealing with more than a simple draft. Trying to patch up these issues on your own can be a waste of time and money, or worse, cause even more damage.
It's time to call in a pro if you spot any of these signs:
- Fog or Condensation Between Window Panes: This is the tell-tale sign of a broken seal in a double- or triple-pane window. The insulating gas has leaked out, and the window's energy efficiency is gone for good. This can't be fixed; it needs to be replaced.
- Warped or Rotted Door or Window Frames: If you can poke the wood and it feels soft, or you see splintering and warping, you've got moisture damage. Caulk is just a band-aid on a much bigger problem.
- Difficulty Opening or Closing: A window or door that sticks, scrapes, or refuses to latch properly might point to a shifting foundation or other structural issues. That’s a job for an expert assessment, not a tube of caulk.
- Visible Cracks in the Glass: This one’s a no-brainer. It’s a major safety and security risk that needs immediate, professional replacement.
For serious issues like these, the smartest and safest route is to explore professional window and door replacement services. It guarantees the job is done right, protecting your home for years to come.
Common Questions About Winterizing Your Home
Even with the best game plan, a few questions always seem to pop up once you start pulling out the caulk gun and weatherstripping. Getting these details right is the difference between a so-so job and a home that’s truly sealed up for winter.
Let’s dig into some of the most common things people ask when they're getting their homes ready for the cold.
How Can I Tell If My Old Weatherstripping Needs to Be Replaced?
Here’s a trick I’ve used for years: the paper test. Shut a door or window on a single sheet of paper. If you can slide it out without any real resistance, your seal is shot. A good seal should grip the paper firmly.
Beyond that, just use your eyes and hands. Is the weatherstripping cracked, brittle, or literally crumbling away? Is it flattened and no longer springy to the touch? If you see any of that, it's time for a replacement. Fresh weatherstripping should feel soft and pliable.
Is Window Insulation Film Really Effective and Is It Hard to Remove?
It absolutely is. For the price, you can't beat the performance of window insulation film. It works by creating a pocket of trapped air between the film and the glass, acting as an extra layer of insulation. For old, drafty single-pane windows, it's a game-changer.
And don't worry about the removal. When spring rolls around, the film peels right off. The double-sided tape might leave a little sticky residue behind, but a bit of rubbing alcohol or a standard adhesive remover usually takes care of it without any damage to the window frame.
Pro Tip: If you only have the time or budget for one task, caulk the exterior. It's your home's first line of defense against water damage, which is a much bigger and more expensive problem than a simple draft.
Should I Caulk My Windows from the Inside or the Outside?
The short answer? Both. They do two completely different jobs.
Exterior caulking is non-negotiable. This is what stops rain and moisture from getting into your walls in the first place. You need a top-quality, exterior-grade silicone caulk that can handle whatever the weather throws at it.
Interior caulking is more for comfort. It seals the final gaps between the window trim and the wall, stopping those annoying little drafts that manage to sneak past the outer defenses.
What Other Areas Should I Check Besides Windows and Doors?
Once you’ve tackled the obvious spots, it’s smart to look up. One of the sneakiest winter problems we see in Upstate SC is ice buildup in gutters. When this happens, melting snow has nowhere to go and can back up under your shingles, leading to serious water damage inside your attic and walls.
It’s an issue that goes hand-in-hand with a well-sealed home. We have a whole guide on preventing ice dams in gutters that explains how to spot the signs and stop the problem before it starts.
At Atomic Exteriors, we know that protecting your home from an Upstate South Carolina winter is about more than just a tube of caulk. If you’re fighting a losing battle with old, inefficient windows or doors that are past the point of a DIY fix, we can help. Our team specializes in professional, energy-efficient replacements that make a real difference.
Contact us today for a free, no-obligation estimate and find out how we can make your home warmer, safer, and more valuable.