
A Pro Guide on How to Paint Fiber Cement Siding
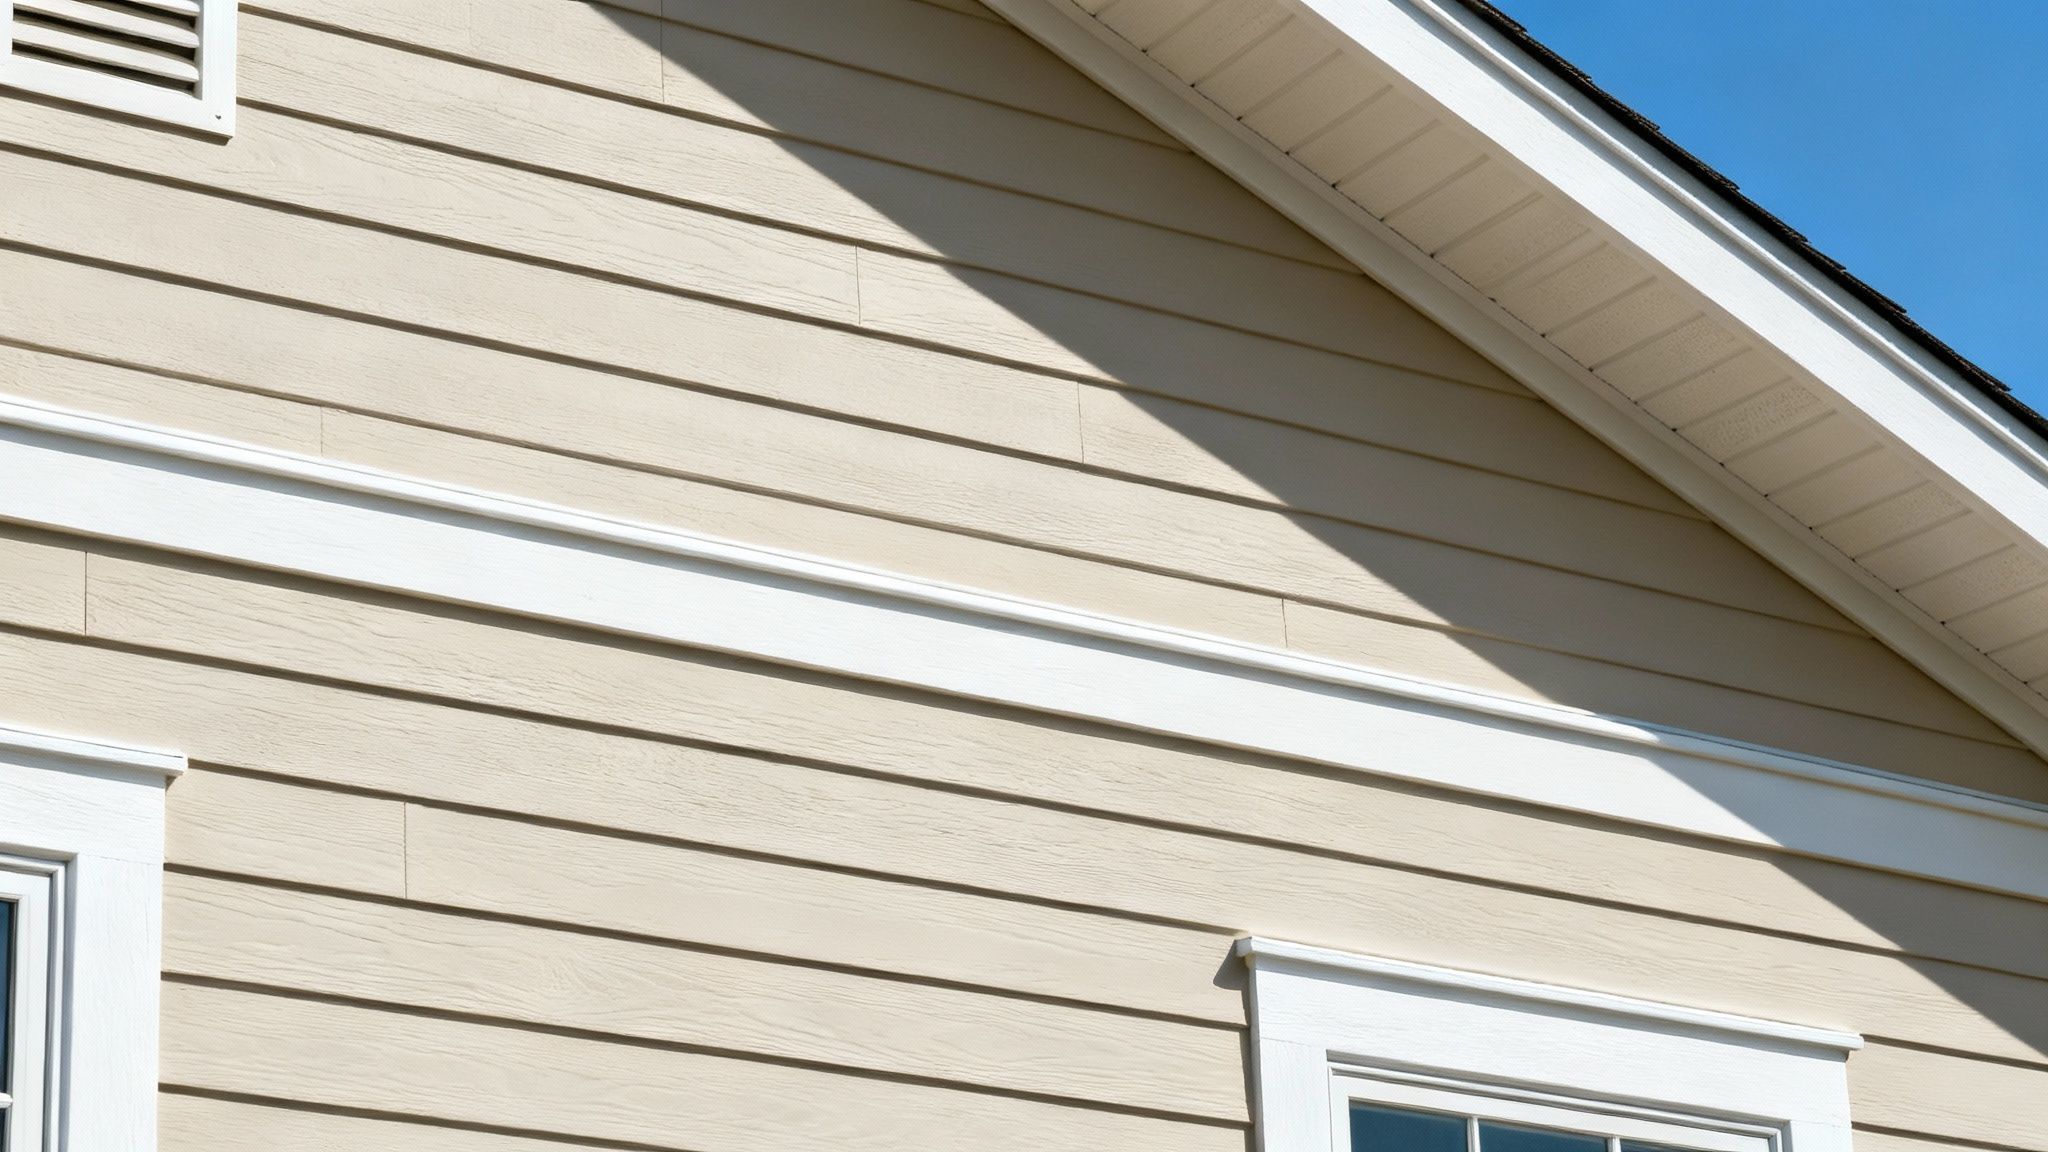
Painting your fiber cement siding isn't just about picking a new color—it’s one of the most important maintenance jobs you can do for your home. A fresh, high-quality paint job is like a shield, defending your siding from moisture, UV rays, and everything else the weather throws at it.
Why a Pro-Level Paint Job on Fiber Cement Is So Important
A fresh coat of paint is one of the most rewarding home improvement projects you can tackle. It delivers an instant curb appeal boost, sure, but the real value is in the protection. The right paint seals the siding, preventing moisture from seeping in and causing expensive, long-term headaches down the road.
There's a reason you see fiber cement everywhere these days. The global market is growing fast, with siding expected to make up 34.75% of it by 2025. But this durability depends on proper care. If you don't prep it right, fiber cement can soak up 20% more moisture than it should, which can eventually lead to swelling or even cracking.
The Foundation of a Lasting Finish
Want a paint job that lasts for years, not just a season or two? It all comes down to prep work. This is the single biggest reason DIY paint jobs fail. Cutting corners here is a recipe for peeling, bubbling, and frustration.
This guide is your roadmap. We'll walk through every step you need for a successful project, whether you're a die-hard DIYer or figuring out when to call in the pros. If you decide the job is too big, finding qualified local siding contractors near me is always a smart move.
A professional-grade paint job is about more than just slapping on some color. It’s a systematic process of cleaning, repairing, and priming to create a perfect canvas. Get that right, and your paint will stick better and last longer.
Before we dive into the "how," it's worth understanding the "why." To get a better sense of how crucial the first steps are, check out this great resource on Why Proper Prep Is the Secret to Long-Lasting Exterior Paint.
To give you a better sense of the journey ahead, here’s a quick overview of what a proper paint job involves.
Fiber Cement Painting Project at a Glance
| Preparation | Create a clean, smooth, and stable surface for paint to adhere to. | Washing, scraping, repairing damage, and caulking gaps. |
| Priming | Seal the siding and ensure the new paint color looks even and vibrant. | Applying a high-quality acrylic primer to all surfaces. |
| Painting | Apply a protective, beautiful topcoat that will last for years. | Using 2 coats of 100% acrylic latex paint with a sprayer, roller, or brush. |
| Cleanup & Curing | Ensure a clean finish and allow the paint to harden properly. | Removing all tape, cleaning up, and protecting the surface from moisture. |
Following these key stages will help you get a result that doesn't just look fantastic but also protects your home for the long haul.
Gathering the Right Tools and Materials
Walking into a hardware store without a plan is a surefire way to overspend and still forget something crucial. When you're tackling a fiber cement siding paint job, having the right gear from the very beginning makes the entire process smoother and a whole lot safer.
This isn't about buying every fancy gadget on the shelf. It’s about building a smart, curated toolkit that will help you achieve a professional-grade finish. Let's break down the essentials into three categories so you know exactly what to grab and why.
Preparation and Repair Gear
This is where the magic really happens. A long-lasting paint job is built on a solid foundation, and cutting corners here is the fastest way to see peeling and chipping within a year or two.
- Pressure Washer: Look for a unit that puts out between 1500-2500 PSI. That’s the sweet spot—powerful enough to blast away chalky residue and grime without gouging or damaging the siding itself.
- Stiff-Bristle Brush & Bucket: Absolutely necessary for stubborn spots. It's also your best friend for cleaning areas near delicate plants or windows where a pressure washer is just too aggressive.
- Caulk Gun & Elastomeric Sealant: Do yourself a favor and skip the standard painter's caulk. Elastomeric sealant is designed to flex, expanding and contracting with the temperature swings to keep joints sealed tight for years.
- Putty Knife & Scraper: You'll need these for digging out old, brittle caulk and smoothing over any minor repairs you have to make.
Application Tools for a Flawless Finish
The tools you use to actually apply the paint have a massive impact on the final look. Investing in quality gear here really pays off with a smoother, more uniform appearance that you'll be proud of.
An airless paint sprayer is what the pros use, and for good reason. It lays down an even coat quickly and efficiently, which is a game-changer on large exterior walls. If you’re working with textured fiber cement, a spray tip size between .015 and .019 will give you fantastic coverage without globbing paint on the surface.
Pro Tip: The secret to a perfect spray job is "back-brushing" or "back-rolling." As soon as you spray a section, immediately go over it with a brush or roller. This simple step pushes the paint deep into the siding's texture, ensuring it grabs on for maximum adhesion.
You'll also need a few other key items:
- High-Quality Angled Brush: A 2.5 to 3-inch angled sash brush is perfect for "cutting in"—that's the term for creating those crisp, clean lines around windows, doors, and trim.
- Paint Rollers & Tray: Grab a roller with a thick 3/4-inch nap. It's designed to get paint down into the grooves of textured siding panels, leaving no spot untouched.
- Painter’s Tape & Drop Cloths: Don't skip these! They’ll protect your windows, light fixtures, and landscaping from overspray and drips. A little prep saves a lot of cleanup.
Essential Safety Equipment
This part is non-negotiable, especially when you’re working up on a ladder or using spray equipment. Your basic safety kit should always include:
- Safety Goggles or Glasses: Protect your eyes from paint mist, dust, and any cleaning solutions.
- Respirator Mask: This is absolutely crucial when spraying. You do not want to be inhaling fine paint particles.
- Gloves: A simple way to keep your hands clean and protected from chemicals.
- Sturdy Ladder: Make sure it’s the right height for the job and always, always place it on stable, level ground.
Having the right equipment ready to go before you even pop the first can of paint transforms the project from a frustrating chore into a manageable, and even enjoyable, task. For more insights on materials and their durability, you can learn about various types of siding and what makes them last.
Prep Work: Where the Magic Really Happens
A stunning, long-lasting paint job on fiber cement siding is built long before you ever open a can of paint. This is the stage where most DIY projects go wrong, but it’s precisely where yours is going to succeed.
Think of it like laying the foundation for a house—get this part right, and everything that follows will be stable, durable, and look fantastic. We’ll break this down into three simple parts: inspection, cleaning, and repairs. Rushing here is the fastest way to guarantee peeling, bubbling, and having to do it all over again in a year or two.
This visual guide breaks down the core phases of the project, highlighting the essential tools for preparation, application, and safety.
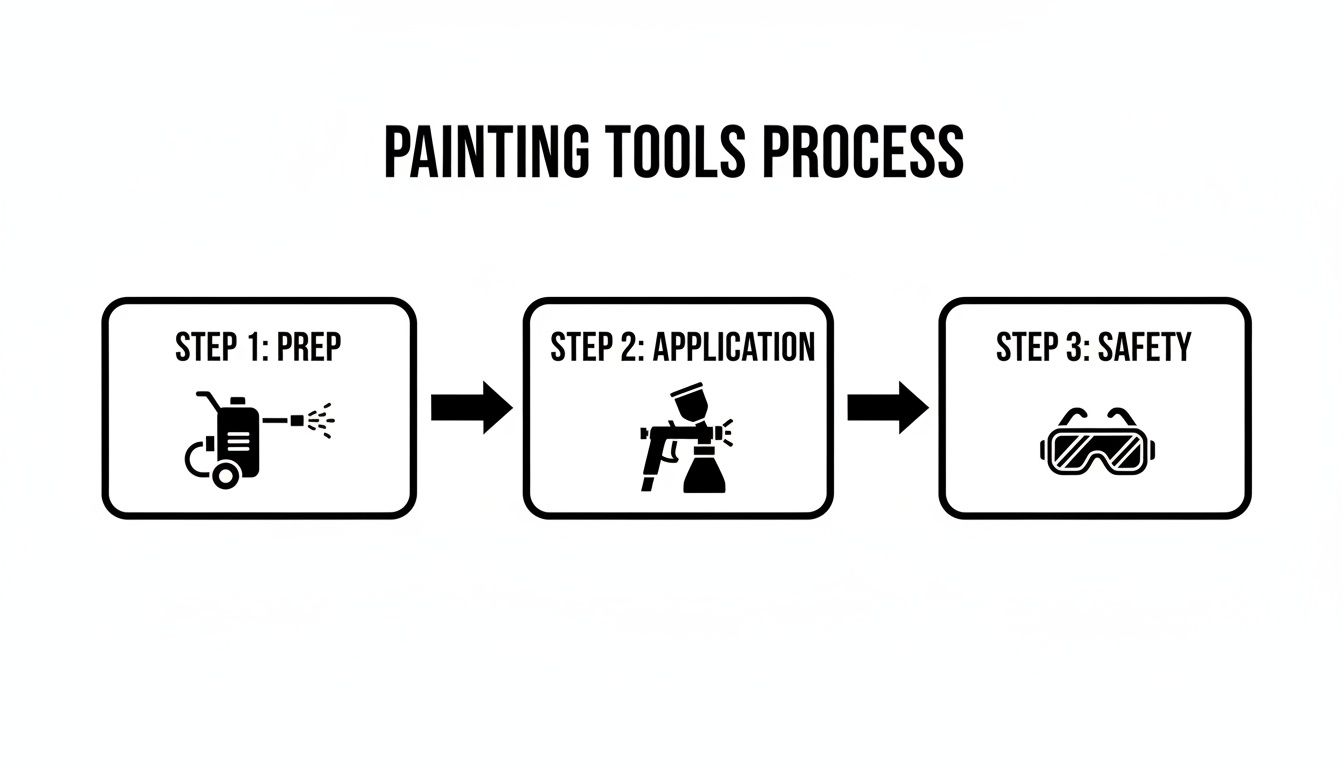
As you can see, a great result depends on moving from a perfectly prepped surface to a safe and effective application. Let's get into it.
Give Your Siding a Detailed Inspection
Before you even think about grabbing a hose, walk the entire perimeter of your home with a critical eye. You're on the hunt for any imperfection that could sabotage the new paint. This isn't just a quick glance; get up close and examine every seam, corner, and joint.
You’re specifically looking for these common culprits:
- Failing Caulk: Is the sealant around windows, doors, and corner trim cracked, brittle, or pulling away?
- Mildew and Algae: Spot any green or black splotches? They love to hide on shaded, north-facing walls or near landscaping that stays damp.
- Dirt and Grime: A thin layer of dirt, pollen, or chalky residue from old paint will stop the new paint from bonding correctly.
- Physical Damage: Make a note of any chips, cracks, or holes in the siding panels themselves.
This initial walkthrough is your diagnostic tool. Keeping a running list is a great idea and can be part of a bigger maintenance plan. For a comprehensive approach, check out our exterior home maintenance checklist for more tips.
The Cleaning Process, Done Right
Once you’ve identified the problem areas, it’s time to clean. The goal here is a completely sterile surface for the primer and paint to grab onto. For most homes, a pressure washer is the most efficient way to get this done.
Stick to a low-pressure setting—somewhere between 1500 and 2500 PSI is the sweet spot. Anything higher and you risk forcing water behind the siding panels or even damaging the surface itself. Stand back a few feet and work from top to bottom in wide, sweeping motions.
For stubborn mildew, a simple solution of one part bleach to four parts water applied with a brush does the trick. After scrubbing, rinse the area thoroughly and let the siding dry completely for at least 24-48 hours.
Never, ever paint siding that feels even slightly damp to the touch. Trapped moisture is the number one cause of blistering and peeling paint down the line. It's a rookie mistake that's easy to avoid with a little patience.
Making Essential Repairs and Caulking Like a Pro
With a clean, dry surface, you can now tackle the repairs you spotted during your inspection. This is where your attention to detail really pays off.
Start by using a putty knife to carefully scrape out all the old, failing caulk from the joints. You need to get it all out to ensure the new sealant can form a strong, watertight bond.
When it's time to re-caulk, don't just grab any tube off the shelf. You need a high-quality elastomeric sealant. This stuff is designed to remain flexible, stretching and compressing as your home expands and contracts with the seasons. That flexibility is critical for preventing gaps from re-opening. In fact, industry data shows that a whopping 95% of paint failures can be traced back to missed caulk gaps over 1/8-inch wide. It's that important.
Choosing the Best Primer and Paint
Picking the right coatings for fiber cement isn’t just about the color you see on a swatch card—it’s about chemistry. Fiber cement siding is naturally alkaline, which means it has a high pH. If you slap on the wrong kind of paint, you're setting yourself up for a chemical reaction that will cause peeling and bubbling in no time.
Getting this step right from the start is the difference between a paint job that lasts for a decade and one that fails after the first season. This isn't the place to cut corners. The science of the material demands products that can handle its unique properties.
The Non-Negotiable Primer
Let’s be clear: your first coat is the most important one. When it comes to fiber cement, a 100% acrylic masonry primer is the only real option. This stuff is specifically formulated to grab onto high-pH surfaces and create a neutral, stable base for your paint.
Think of it as a chemical peacemaker. It forms a bridge between the alkaline siding and your topcoat, ensuring the paint can actually stick. Without it, you’re just asking for trouble. A good primer ensures that final color looks rich, even, and professional, without the siding's chemistry sabotaging it from underneath.
Selecting the Perfect Topcoat
Once your primer is on and fully cured, you’ll want to reach for a 100% acrylic latex paint. This is the hands-down winner for painting fiber cement, and for a few very good reasons:
- Flexibility: As temperatures rise and fall, your siding expands and contracts. Acrylic latex paint is flexible enough to move right along with it, which prevents the cracking and peeling you see with more rigid paints.
- Breathability: This is huge. Acrylic latex allows tiny amounts of water vapor to escape from behind the paint film. This prevents moisture from getting trapped, which is the main culprit behind blistering and bubbling.
- Durability: A high-quality acrylic paint gives you fantastic protection against UV rays, which cause fading, and it’s also great at resisting mildew growth. Your home will just look better, longer.
One of the biggest mistakes homeowners make is using an old can of oil-based paint. Oil-based coatings create a non-breathable shell that traps moisture. Within a year or two, you’ll be looking at a catastrophic paint failure. Stick exclusively to acrylic latex formulas.
The ability to use these modern, durable coatings is one of the key benefits of fiber cement siding, allowing for a finish that’s as tough as it is beautiful.
Paint and Primer Selection for Fiber Cement
Choosing between the different types of acrylic coatings can feel a bit overwhelming, but each is designed for a specific purpose. Here’s a quick breakdown to help you pick the right products for your project.
| Acrylic Masonry Primer | Neutralizes high pH & promotes adhesion | The essential first coat on bare or new fiber cement siding. | Any other type of primer (e.g., oil-based, standard latex). |
| 100% Acrylic Latex Paint | Flexible, breathable, & weather-resistant | The topcoat for all fiber cement siding, trim, and soffits. | Oil-based or alkyd paints, which trap moisture. |
| Acrylic Solid Stain | Penetrates slightly for a flat, natural look | An alternative to paint for a more muted, integrated color. | Semi-transparent stains that don't offer enough UV protection. |
Ultimately, pairing a high-quality acrylic primer with a premium acrylic latex paint is the gold-standard combination that pros trust for a long-lasting finish on fiber cement.
Choosing the Right Sheen
The paint’s sheen—or finish—does more than just affect how your house looks. It also plays a big role in durability and maintenance.
- Flat/Matte: This finish has no shine, which is fantastic for hiding minor bumps and dings on your siding. It gives a very modern, velvety look, but it’s the least scrubbable and can be prone to showing scuffs.
- Satin/Eggshell: This is the sweet spot and by far the most popular choice for siding. It has a soft, low-key luster that’s much easier to clean than a flat finish but isn’t overly shiny. It offers the perfect balance of looks and durability.
- Semi-Gloss: With its noticeable shine, semi-gloss is incredibly durable and easy to wipe clean. That makes it perfect for high-contact areas like trim, doors, and shutters. The downside? That reflectiveness will highlight every single imperfection on the surface.
For most homes, a satin finish is the way to go. It delivers that perfect, subtle sheen that holds up well to the elements and makes cleaning a breeze.
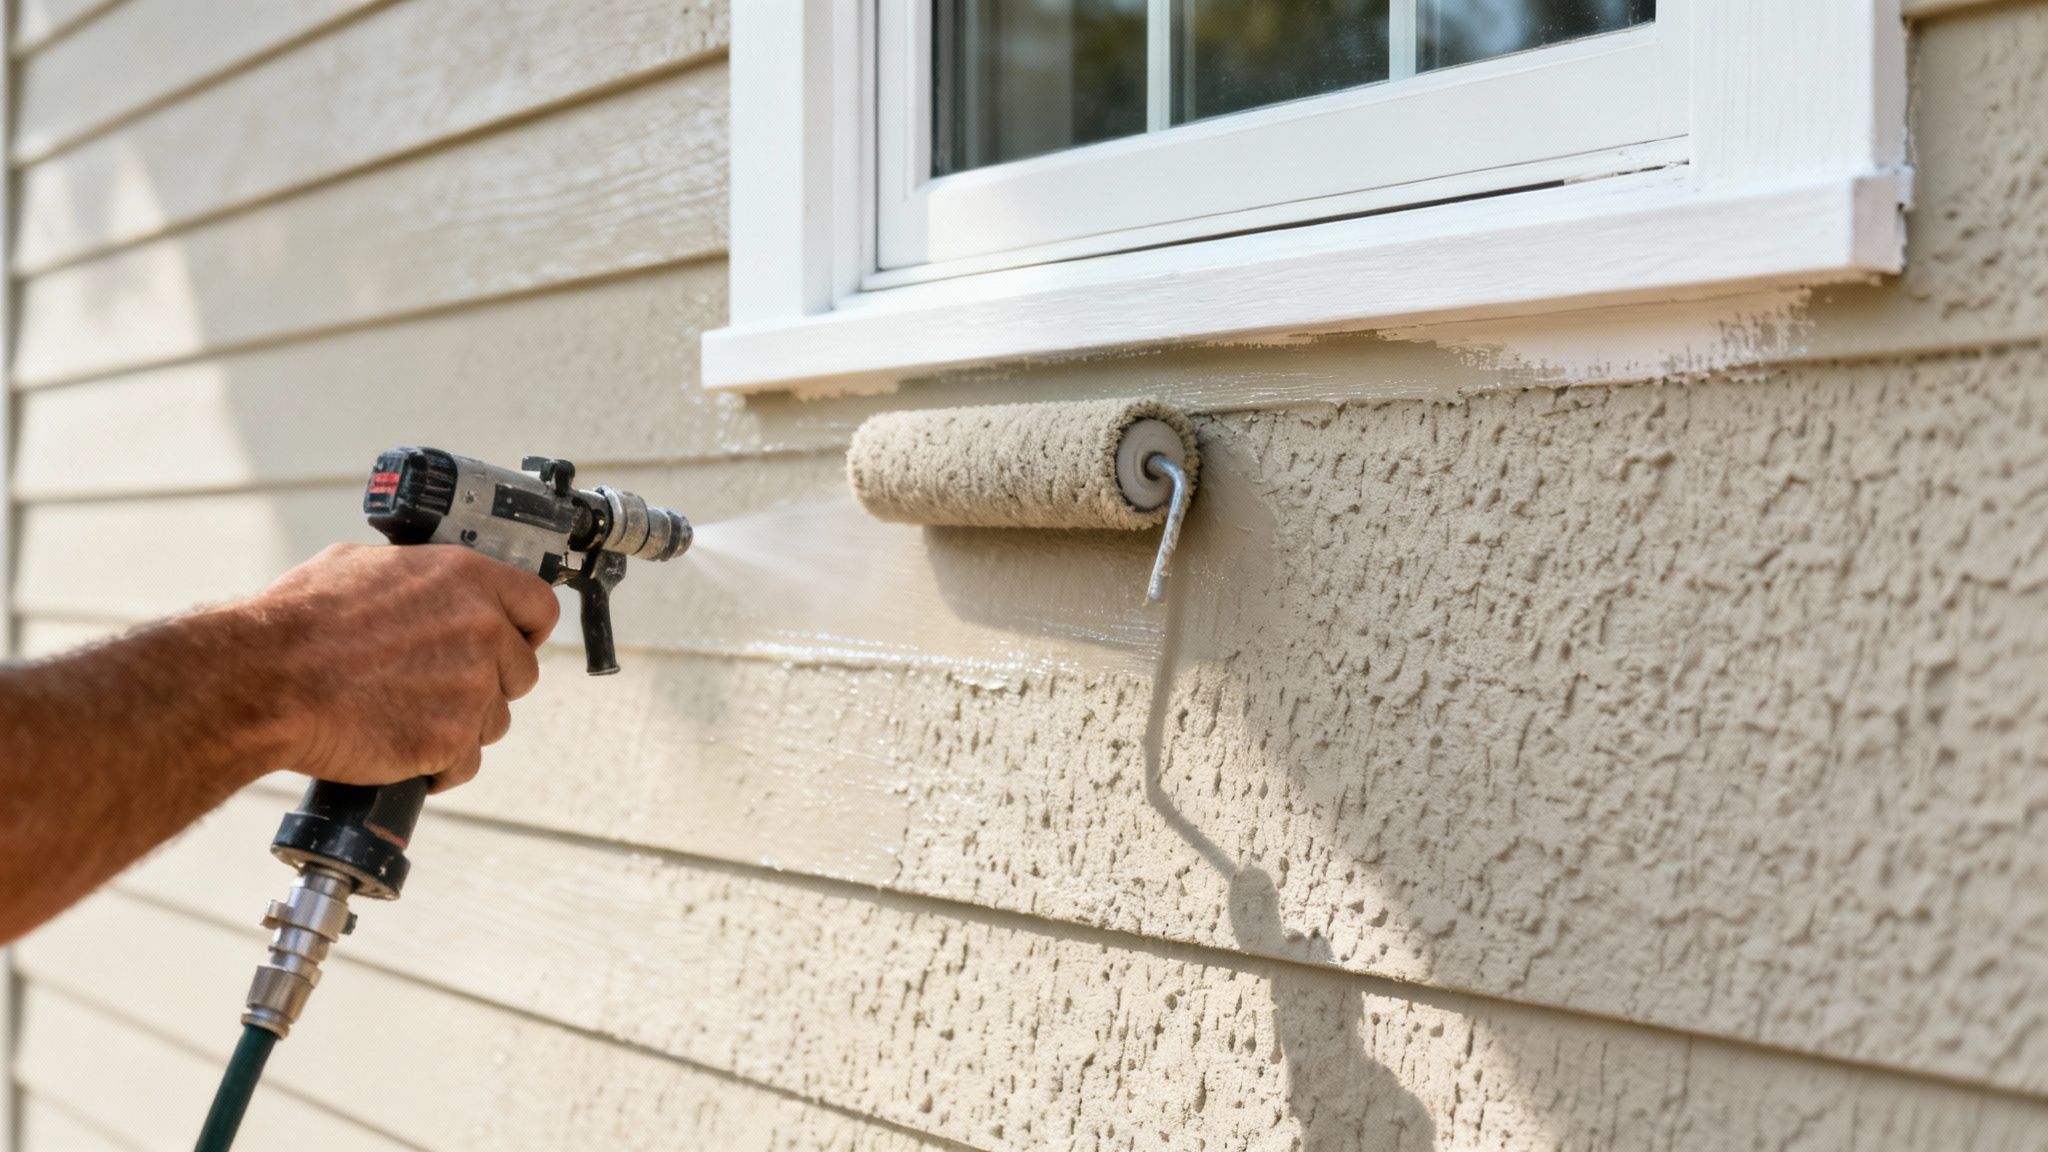
All that careful prep work comes down to this moment—the actual painting. This is where you take a clean, stable surface and give it that beautiful, professional finish. We're going to focus on the "spray and back-roll" method, which is what the pros use to get a uniform, durable coat that really lasts.
This technique is about more than just speed; it’s all about quality. By spraying the paint and immediately rolling over it with a roller, you’re physically pushing that coating deep into the siding's texture. This simple mechanical step ensures the best possible adhesion and gets rid of any thin spots that could lead to paint failure down the road.
Setting Up Your Airless Sprayer
An airless sprayer might look intimidating, but it’s pretty straightforward once you get the hang of it. The whole game is about consistent movement and getting the setup right from the start.
First, check if your paint needs thinning—most modern, high-quality acrylic paints are ready to spray right out of the can. A huge part of getting a great finish is choosing the right tip size for airless sprayer finishes, as this directly affects your results. For most fiber cement jobs, a .015 to .019 tip gives you that perfect balance of paint flow and even coverage.
Once you have your sprayer primed, grab a big piece of cardboard and do a few practice runs. This is your chance to get a feel for the spray pattern and dial in the pressure. You're looking for a nice, even mist without heavy "tails" or lines at the edges of your pattern.
The Spray and Back-Roll Method in Action
The secret to a beautiful, streak-free finish is working systematically. Tackle manageable sections, usually about 4 to 6 feet wide at a time. This gives you enough time to back-roll the area you just sprayed before the paint starts to get tacky.
Here’s how to get a pro-level result:
- Keep Your Distance: Hold the spray gun about 12 inches from the siding. If you get too close, you'll get runs. Too far, and you'll end up with a dusty, uneven coat.
- Stay in Motion: The sprayer should always be moving in a smooth, steady pass. Start spraying just before your section begins and release the trigger just after it ends to prevent thick blotches.
- Overlap Your Passes: Overlap each spray pass by about 50%. This is the key to avoiding light and dark stripes once the paint dries.
- Back-Roll Right Away: As soon as a section is sprayed, have a partner (or quickly do it yourself) go over the wet paint with a 3/4-inch nap roller. Use light, even pressure—the goal is just to work the paint into the texture, not to push it all around.
The point of back-rolling isn’t to spread more paint; it’s to perfect the coat you just applied. This step forces the paint into every tiny crevice, creating a stronger bond and a more uniform look that you simply can’t achieve with a sprayer alone.
Cutting In for Clean, Crisp Edges
"Cutting in" is just what it sounds like—painting the edges around windows, doors, and trim with a brush before you start spraying or rolling the main walls. This is what creates those sharp, clean lines that scream "professional."
A good 2.5-inch angled sash brush is your best friend here. Only dip the first third of the bristles into the paint, and gently tap off any excess. Don't wipe it on the side of the can, which tends to overload one side of the brush. Then, use a steady hand to paint a crisp line where the siding meets the trim.
Weather Is Your Most Important Partner
Never, ever underestimate the weather. Paint needs the right conditions to cure properly, and trying to paint your fiber cement siding outside of that ideal window is just asking for trouble.
- Ideal Temperature: Look for days where the temperature will stay between 50°F and 90°F, including overnight.
- Avoid Direct Sunlight: Painting in the hot, direct sun can make the paint dry way too fast, which messes with adhesion and can leave you with ugly lap marks.
- Watch the Humidity: If the humidity is creeping above 85%, it's best to wait. High humidity dramatically slows down the drying time.
- No Rain in Sight: Make sure the forecast is clear of rain for at least 24 hours after you've finished for the day.
By respecting the process and paying close attention to these details, you'll end up with a flawless finish that not only looks incredible but gives your home the best possible protection.
Common Questions About Painting Fiber Cement Siding
Even with a step-by-step guide, you’re bound to have a few questions. Let's run through some of the most common ones we hear from homeowners getting ready to paint their fiber cement siding. Getting these answers sorted out now will help you make the right calls throughout the project.
How Often Does Fiber Cement Need Repainting?
A top-notch paint job on well-prepped fiber cement siding can easily last 10 to 20 years. The real-world lifespan really comes down to three things: your local climate, the quality of the paint you chose, and—most importantly—how well the surface was prepped in the first place.
Instead of marking a date on the calendar, it’s much smarter to just give your siding a quick inspection once a year. Look for the classic signs that it’s time for a refresh: chalking (that powdery residue that comes off on your hand), obvious fading, or any spots that are starting to peel. For a deeper dive, you can learn more about how long siding should last to set the right expectations.
Can I Paint Directly Over the Factory Finish?
Yes, you can, but that’s not a free pass to skip prep work. Even if the factory finish looks pristine, that surface has years of dirt, grime, and chalky buildup that has to be cleaned off meticulously.
And if the original coating is showing any signs of chipping or peeling? Those areas absolutely have to be scraped, sanded smooth, and then spot-primed with a high-quality acrylic primer. It’s always a good idea to check the siding manufacturer's specific guidelines before you start.
The biggest mistake homeowners make is rushing or skipping surface preparation. Painting over dirt, mildew, or failing caulk guarantees premature paint failure, often within just a year or two. Investing time in prep is the single most important step.
Is Using a Separate Primer Really Necessary?
We strongly recommend it. I know those "paint and primer in one" products are tempting, but a dedicated 100% acrylic masonry primer is formulated specifically to bond with fiber cement's high-pH surface. It creates a neutral, uniform base that helps the topcoat stick better and ensures the color you picked is the color you get.
Primer is especially critical on any bare spots, over repairs, or if you're making a big color change from dark to light. Think of it as the ultimate insurance policy for your paint job.
Ready to give your home's exterior the professional-grade protection and curb appeal it deserves? The team at Atomic Exteriors has the expertise to handle your siding project from start to finish, ensuring a beautiful, long-lasting result. Get your free, no-obligation estimate today!