How to Improve Home Insulation for Lasting Comfort
The first step to a better-insulated home is to think of it as a complete thermal barrier. It’s not just about stuffing insulation in the attic. It’s about sealing up air leaks and strategically adding the right insulation in the attic, walls, and floors to finally get control over your comfort and those climbing energy bills.
Why Better Insulation Is Your Home's Best Upgrade
Most people start thinking about insulation when they get a shocking utility bill or can't seem to shake that one drafty room. While saving money is a huge plus, the real value of good insulation goes way beyond your monthly budget. It's a foundational upgrade that makes your house perform better and feel more like a home.
Think of your insulation like a high-tech thermal shield. During our hot, humid summers here in Upstate South Carolina, it’s what blocks the intense solar heat from baking your attic and walls. That means your air conditioner isn't fighting a losing battle all day long. Then, when our chilly winters roll around, it holds onto the precious warmth your furnace produces, keeping it right where it belongs—inside.
The result? A much more stable and comfortable indoor environment, no matter what the weather is doing outside.
More Than Just Energy Savings
The financial perks are great, but the ripple effects of quality insulation improve your day-to-day life in some pretty significant ways:
- A Healthier Home: A well-sealed and insulated house gives you better control over moisture and humidity. That’s a game-changer for preventing mold and mildew, which can trigger allergies and other respiratory issues.
- A Quieter Space: You might not think about it, but materials like cellulose and spray foam are fantastic at dampening sound. They absorb a surprising amount of noise from traffic or your neighbor's lawnmower, creating a much more peaceful home.
- Higher Property Value: Energy efficiency is a huge selling point these days. When it’s time to sell, having documented insulation upgrades shows buyers you’ve made smart, valuable improvements.
The Financial Case for Upgrading
Investing in insulation offers one of the clearest and most measurable returns of any home improvement project. The U.S. Department of Energy estimates that heating and cooling make up a whopping 50% of a typical household's energy use.
Getting your home properly insulated can slash those costs by 20%–30%. You can dive deeper into other great strategies in our guide on how to reduce utility bills.
For most homeowners, this isn't just pocket change—it adds up to serious annual savings. Retrofitting an older home with modern insulation, especially in the attic, is a project that genuinely pays for itself over time.
And don't forget the floor. Understanding the benefits of floor insulation helps you complete the thermal envelope, stopping energy loss from below. This isn’t just a quick fix; it’s a long-term investment in your home’s performance and your family’s comfort for years to come.
Conducting Your Own Home Energy Audit
Before you can start improving your home's insulation, you have to know where the problems are hiding. Think of yourself as a detective looking for clues; a DIY home energy audit is your first and most critical mission. You don't need a truck full of fancy equipment—just some time and a sharp eye to find the weak spots in your home's thermal defense.
This whole process is about figuring out where your heated or cooled air is escaping. By pinpointing these energy drains, you can create a smart action plan that focuses on the improvements that will actually give you the biggest bang for your buck. After all, why spend a fortune insulating a wall when the real culprit is a drafty attic hatch?
Inspecting Your Attic Insulation
Your attic is almost always the best place to start. Since heat rises, a poorly insulated attic is like leaving a window wide open on a cold Upstate SC winter day. Grab a flashlight, a tape measure, and head on up to take a look.
The first thing to check is the depth. If you can clearly see the tops of your floor joists, you almost certainly need more insulation. For our climate, you should have at least 13 to 18 inches of insulation, depending on the type.
While you're up there, keep an eye out for these other common issues:
- Compressed or Matted Insulation: Insulation that's been squashed down by stored boxes or water damage loses a ton of its effectiveness. It needs to be fluffy to work.
- Gaps and Bare Spots: Look for areas where the insulation has shifted over time, leaving the ceiling below completely exposed to the attic air.
- Moisture or Stains: Dark spots on the insulation or the wood framing are a dead giveaway for a roof leak. You absolutely have to fix that before adding any new insulation.
Finding Hidden Air Leaks
Air leaks are the secret enemy of home comfort. They let your conditioned air sneak out through dozens of tiny, invisible cracks and gaps. According to the Department of Energy, these little leaks can account for a huge portion of a home's heating and cooling costs. Learning how to find and seal air leaks is a crucial skill for any homeowner looking to get their energy bills under control.
A simple but surprisingly effective trick is the incense stick test. On a cool, windy day, close all your windows and doors and turn off your furnace or AC. Light an incense stick and carefully hold it near common leak spots:
- Window and door frames
- Electrical outlets and switch plates (especially on exterior walls)
- Where pipes or wires enter your home from the outside
- The attic hatch or pulldown stairs
- Around your fireplace damper
If you see the smoke blow sideways or get sucked out of the room, you've found an air leak.
This simple diagram shows how the benefits of better insulation flow from one to the next.
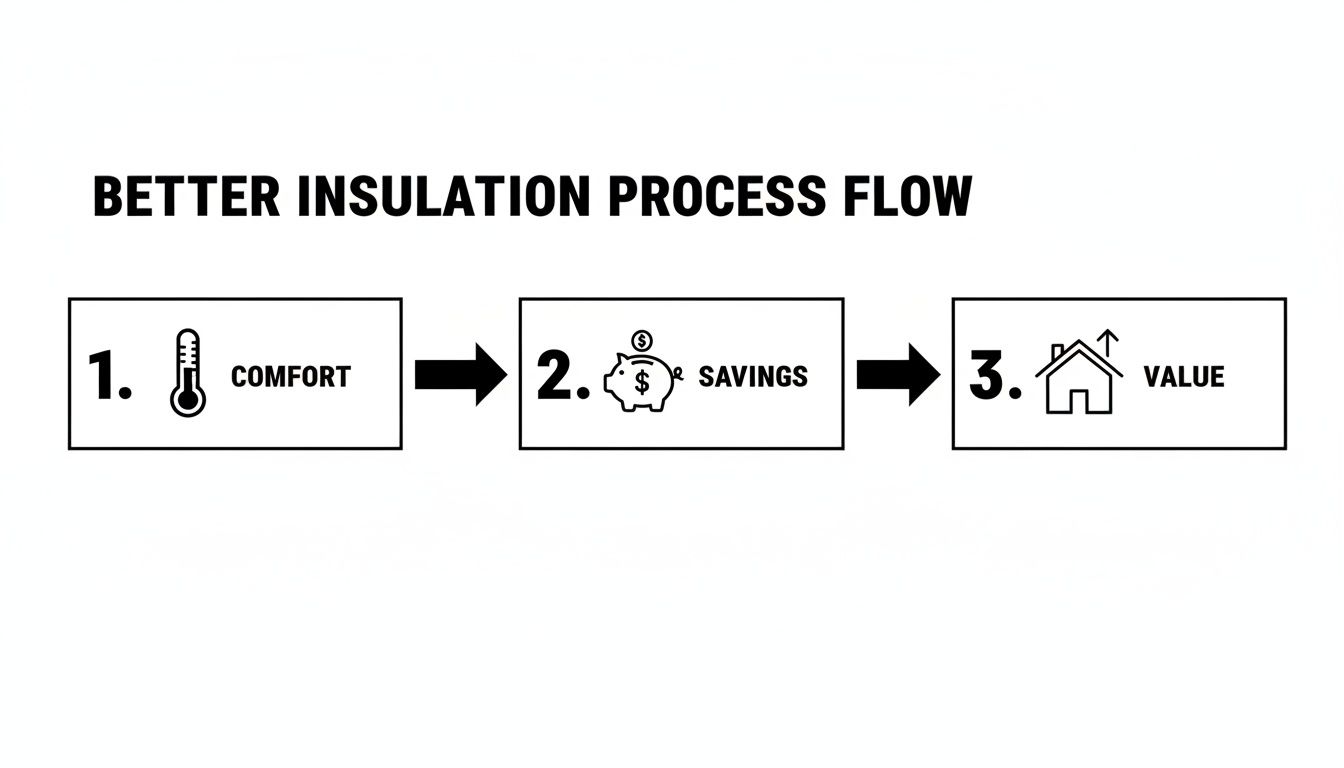
It all starts with better comfort, which leads directly to real energy savings, and that ultimately boosts your home's overall value.
When to Call a Professional
A DIY audit is fantastic for spotting the obvious problems, but sometimes you need a deeper analysis. If you've sealed the major leaks and you still have crazy high bills or uncomfortable rooms, it might be time to bring in a pro for an energy audit.
Professionals use tools like blower doors and infrared cameras to pressurize your home and literally see where heat is escaping. This can uncover hidden issues inside walls or in complex rooflines that are impossible to find on your own.
A professional audit gives you a comprehensive roadmap for all kinds of upgrades, not just insulation. You can discover more strategies in our guide on how to improve home energy efficiency to get the complete picture. This detailed report helps you prioritize projects and make informed decisions, ensuring every dollar you invest truly pays off.
Choosing the Right Insulation Material
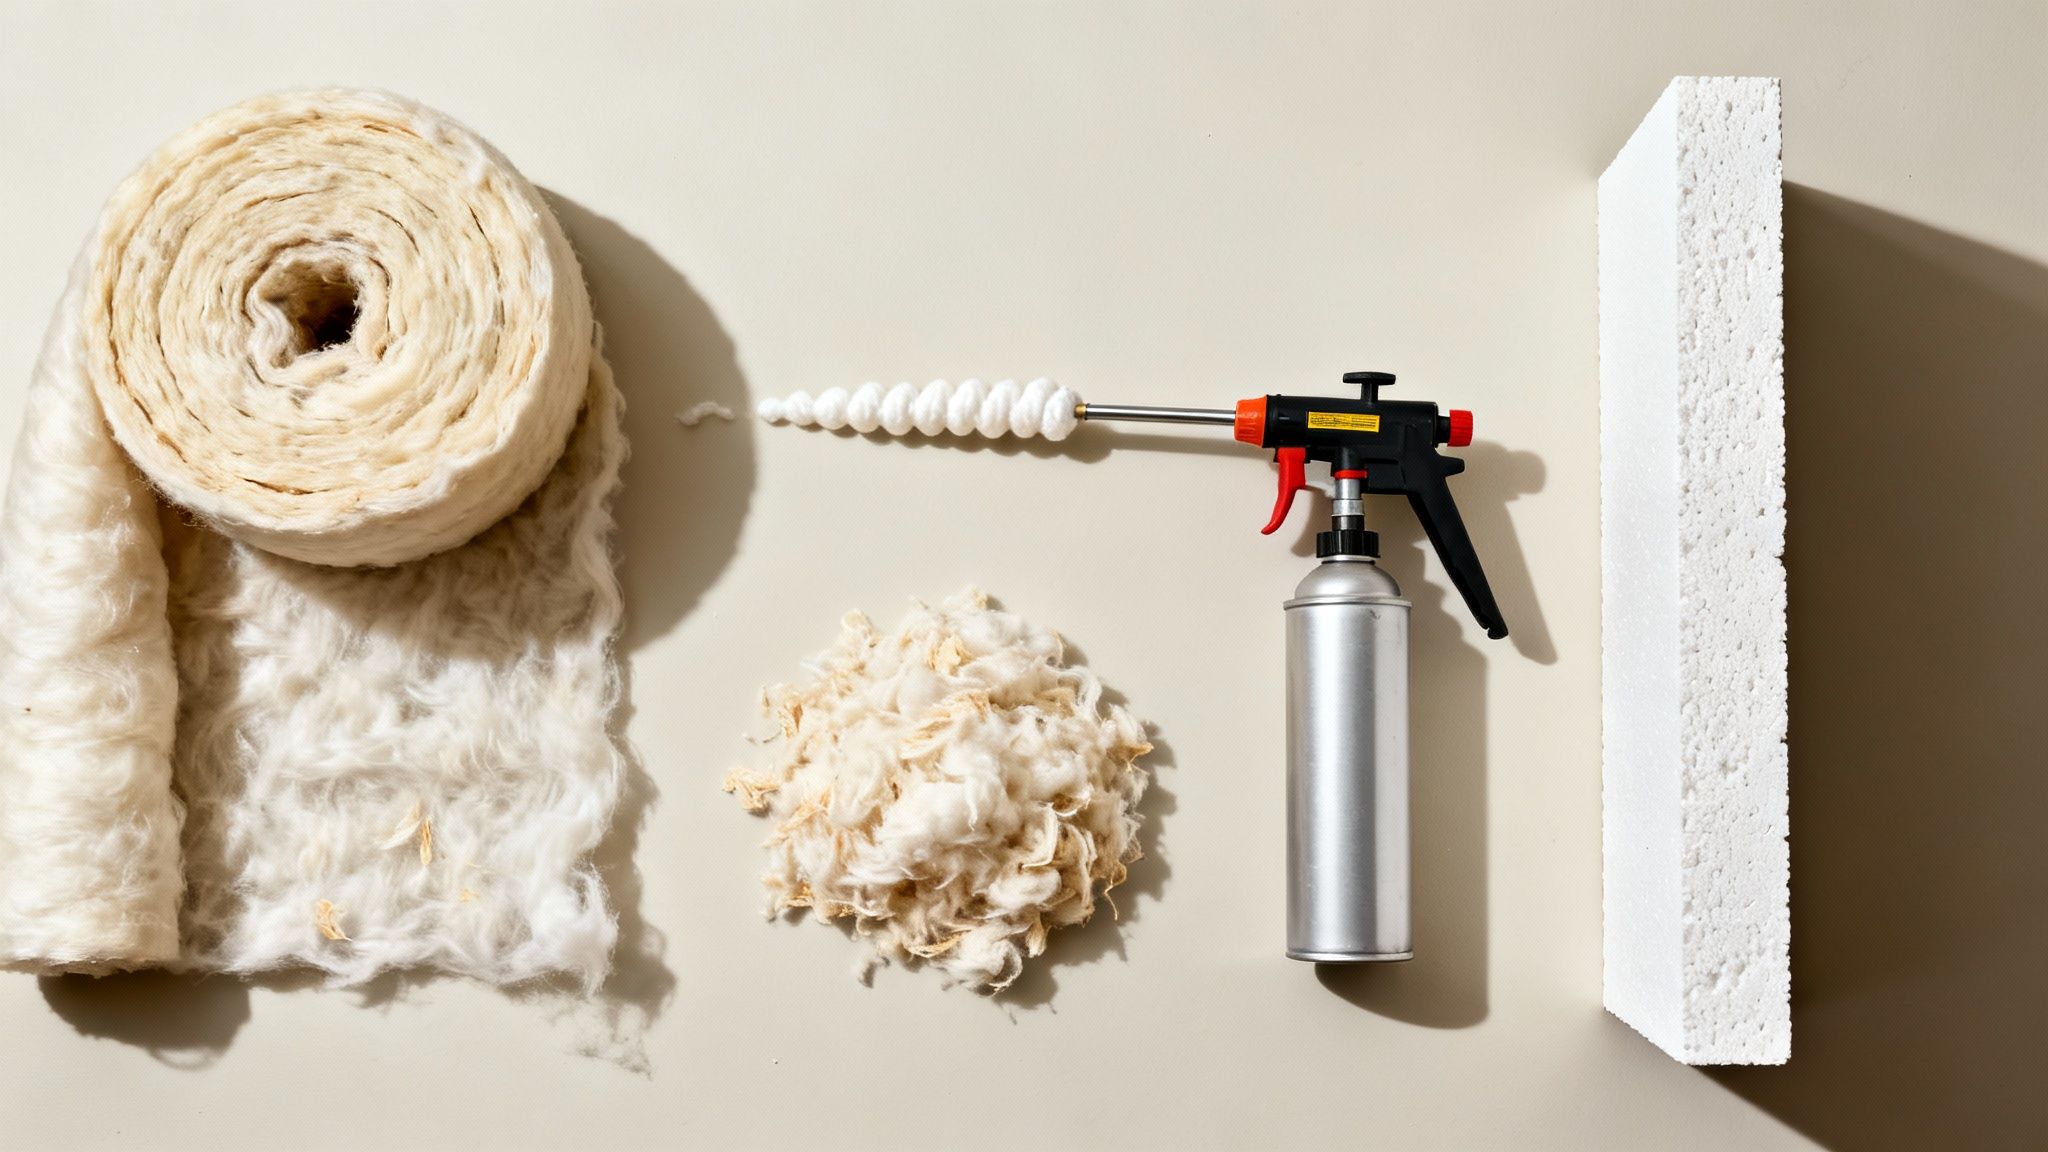
Stepping into the insulation aisle can feel a little overwhelming. You're faced with a wall of options—pink batts, gray fluff, rigid boards, and spray cans. It’s easy to get analysis paralysis.
But making the right choice is crucial. The best material for your attic might be a terrible fit for your basement walls. This decision isn't just about grabbing a product off the shelf; it’s about matching the material to the specific job, your budget, and what your home actually needs to be comfortable.
Let's break down the most common types of insulation to help you figure out where each one truly shines.
First, A Quick Word on R-Value and Local Needs
Before we get into the materials, you have to understand R-value. Think of it as a simple score for an insulation's ability to resist heat flow. The higher the R-value, the better its insulating power. Plain and simple.
For us here in Upstate South Carolina, which falls into Climate Zones 3 and 4, hitting specific R-value targets is the key to unlocking real energy savings. Here are the goals you should be aiming for:
- Attics: R38 to R60 (that’s roughly 13 to 18 inches of insulation)
- Walls: R13 to R15
- Floors & Crawl Spaces: R19 to R25
Getting your home up to these levels is the most direct path to seeing a noticeable drop in your utility bills. Now, let’s look at the materials that can get you there.
The Workhorse: Fiberglass Batts
You know the stuff—those familiar pink or yellow rolls (called batts). Fiberglass is easily the most common and budget-friendly option out there. Made from incredibly fine glass fibers, it's the go-to choice for DIY projects in open, standard-sized spaces like unfinished attics or new wall construction.
It’s great for attics with easy access and for fitting between wall studs before the drywall goes up. The biggest weakness, however, is air leakage. If it isn't cut and installed perfectly to fit snugly, gaps will form, which seriously hurts its performance. It has an average R-value of R-2.9 to R-3.8 per inch.
The Gap-Filler: Blown-In Cellulose and Fiberglass
What about attics with all sorts of weird angles and joist spacing? Or trying to add insulation to walls that are already closed up? This is where blown-in material is a fantastic solution. This category includes cellulose (made from recycled paper) and loose-fill fiberglass. A special machine blows the material through a hose, letting it settle into every single nook and cranny.
This method creates a much more seamless thermal blanket than batts can, which is a huge win for reducing air leakage. Cellulose often has a slight edge in performance and sound-dampening, with an R-value of R-3.1 to R-3.8 per inch.
Pro Tip: For existing walls, we can drill small, discreet holes from the outside, blow in dense-pack cellulose to fill the cavity completely, and then plug the holes. It’s a minimally invasive way to dramatically improve your wall performance without a major remodel.
The High-Performer: Spray Foam
When it comes to pure performance, spray foam is the undisputed champion. It offers the highest R-value per inch and creates an incredible air seal. It's a chemical product that expands the second it's applied, creating a powerful, airtight barrier that also blocks moisture.
There are two main types you'll hear about:
- Open-Cell Spray Foam: This type is spongy and flexible. It’s great for soundproofing and has an R-value of around R-3.6 per inch.
- Closed-Cell Spray Foam: This one is rigid and dense. It actually adds structural strength and provides a vapor barrier. It boasts an impressive R-value of R-6.0 to R-7.0 per inch.
Spray foam is more expensive and requires professional installation, so we typically use it strategically. It's perfect for areas where air sealing is absolutely critical, like the rim joists in a basement or sealing an entire attic roof deck to create a conditioned, usable space.
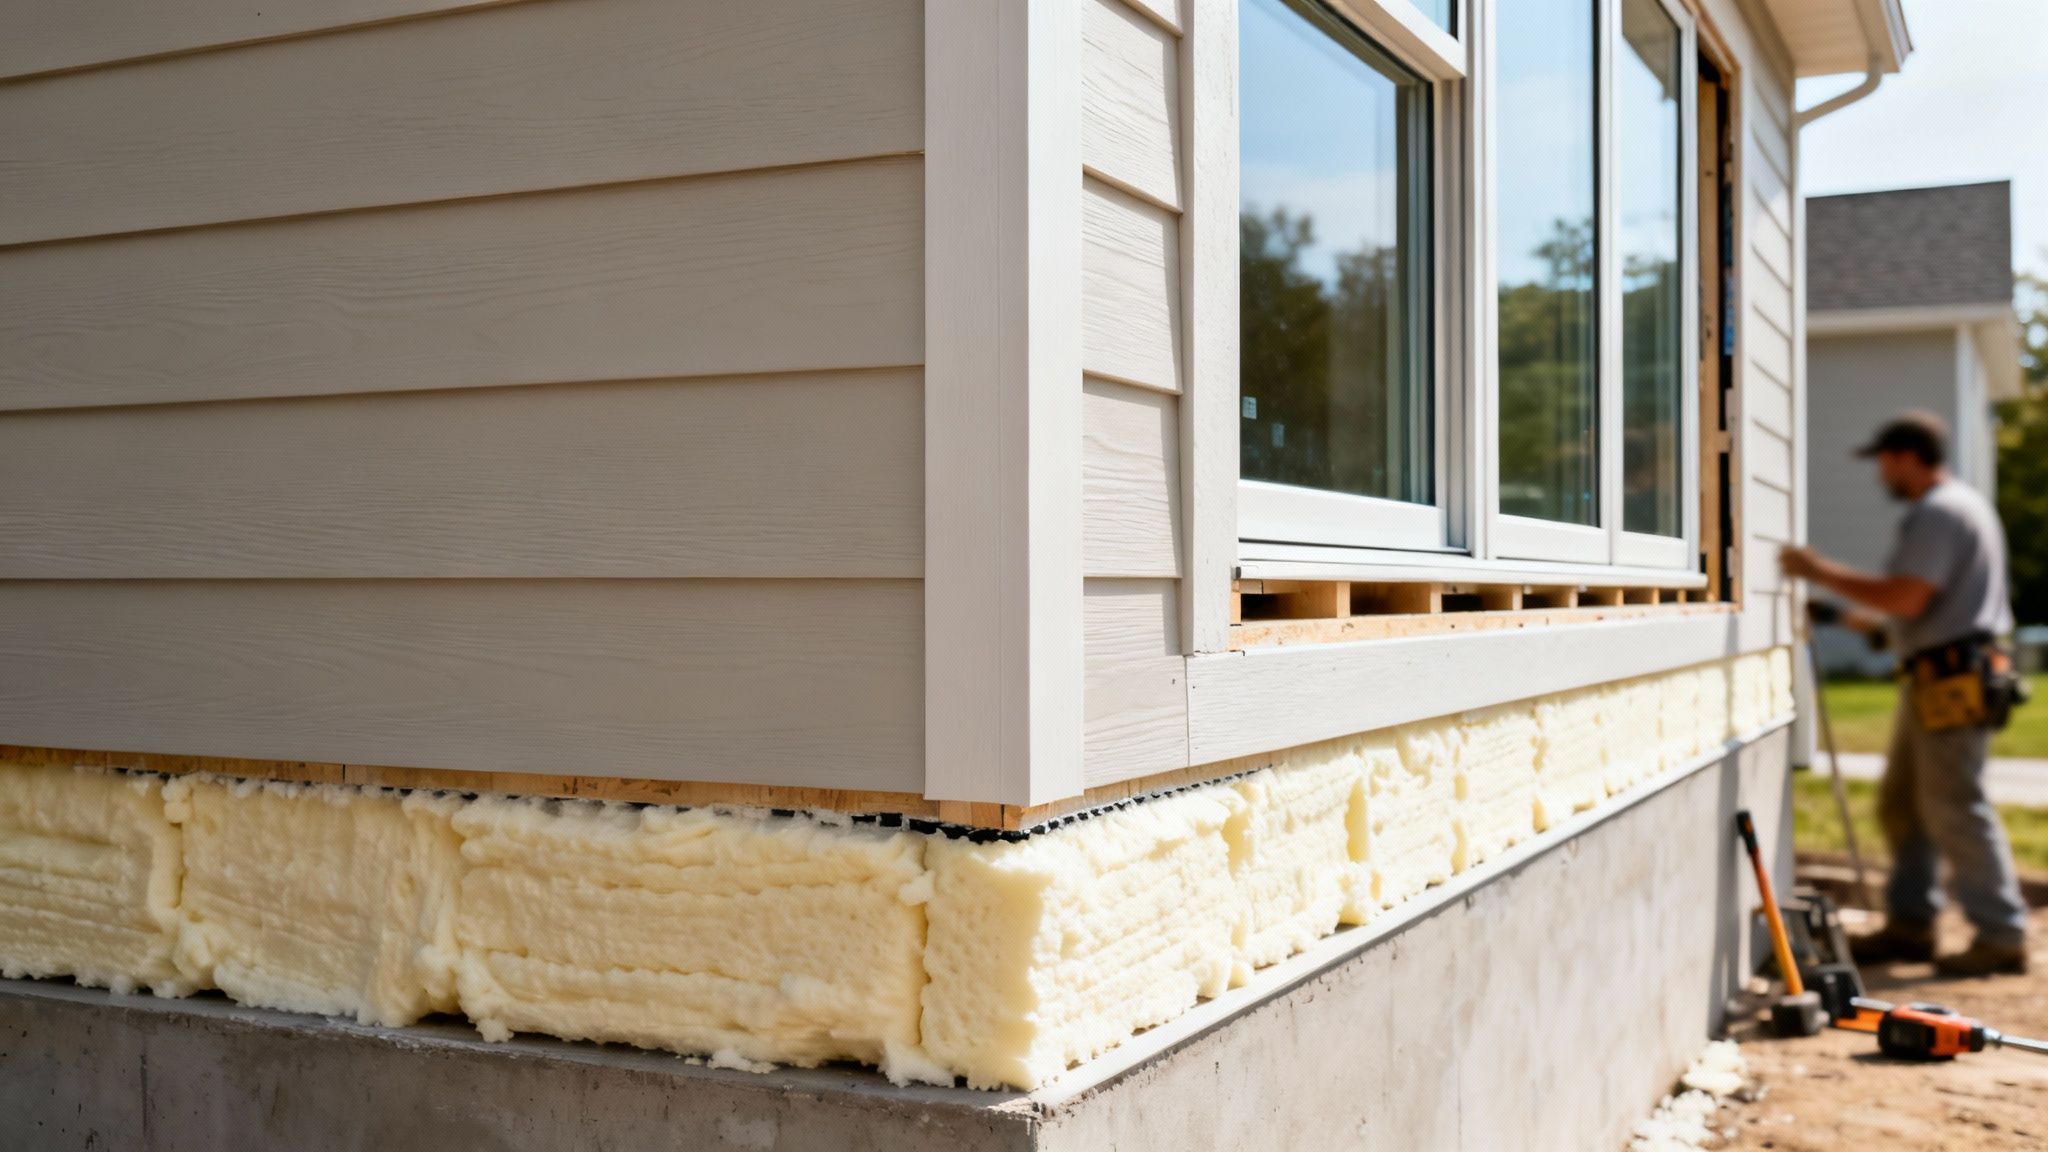
The Foundation Protector: Rigid Foam Boards
Rigid foam boards, made from materials like polystyrene, are dense sheets that provide excellent thermal resistance and moisture control. They aren't meant for filling wall cavities but are the perfect solution for insulating foundation walls, basement slabs, and the home's exterior sheathing.
With an R-value ranging from R-4.0 to R-6.5 per inch, these boards are essential for stopping thermal bridging—that's when heat escapes right through the wood studs in your walls, bypassing the insulation.
This focus on the complete building envelope is a huge trend. Globally, homeowners are investing more in exterior insulation upgrades, contributing to a global building insulation market valued at USD 28.90 billion in 2023. You can learn more about the growing market for building insulation and see how products like insulated siding and energy-efficient windows work together to create a tougher, more efficient home.
Comparing Common Home Insulation Materials
To help you visualize the best fit for your project, here’s a quick side-by-side comparison of the most popular insulation types. Each has its place, and the right choice often depends on where in the house you're working.
| Fiberglass | Batts, Rolls, Loose-Fill | R-2.9 to R-3.8 | Open attics, new wall cavities, DIY projects | Affordable, widely available, easy for DIY | Can leave gaps, loses R-value if compressed |
| Cellulose | Blown-In/Loose-Fill | R-3.1 to R-3.8 | Existing walls, irregular attic spaces, soundproofing | Excellent gap-filler, eco-friendly (recycled), good sound barrier | Can settle over time, requires a machine to install |
| Spray Foam | Sprayed Liquid (expands) | R-3.6 (Open-Cell), R-6.0 (Closed-Cell) | Air sealing critical areas, rim joists, unvented attics | Superior air sealing, high R-value, adds structural strength | Highest cost, requires professional installation |
| Rigid Foam | Boards/Sheets | R-4.0 to R-6.5 | Basement walls, foundation slabs, exterior sheathing | High R-value, moisture resistant, adds continuous insulation | Not for irregular spaces, joints must be taped |
Choosing between these options comes down to balancing performance, budget, and the specific application. A hybrid approach—like using spray foam to air seal an attic and then topping it with blown-in cellulose—is often the most effective strategy.
Creating Your Home Insulation Action Plan
Okay, you’ve done the detective work and have a good idea of your home's weak spots. Now it’s time to turn that knowledge into a smart, effective plan.
Just throwing insulation at the problem won't cut it. That’s like trying to fill a leaky bucket without patching the holes first. To get the biggest bang for your buck and feel a real difference, you need to be strategic.
For almost every single home here in Upstate South Carolina, the journey starts in the same two places: air sealing and the attic. These are the low-hanging fruit, the wins that make every other improvement work ten times better.
Priority One: Air Sealing the Leaks
Before you even think about adding insulation, you have to plug the leaks. Seriously, this is the single biggest mistake I see homeowners make. Piling new insulation on top of unsealed gaps is like zipping up a thick winter coat but leaving a giant hole in the back—the cold air is still going to find its way in.
Your home audit should have pointed you to the main culprits. Focus your efforts there.
- Seal Gaps Around Plumbing: Get a can of spray foam and go to town on any openings where pipes, wires, or vents enter your home from the basement, crawl space, or attic.
- Weatherstrip Doors and Windows: This is a classic weekend DIY project that delivers immediate results against drafts.
- Caulk Around Trim: Check the exterior caulk around your window and door frames. If it's cracked or missing, a fresh bead will make a world of difference.
Taking care of these leaks can knock your home's heating and cooling energy needs down by 15% to 25% all on its own. It's a foundational step that makes everything else more effective.
Priority Two: Winning the Battle in Your Attic
Heat rises. It’s a simple fact of physics, and it’s why your attic is ground zero for energy loss. In the winter, it’s the main escape route for your expensive heated air. In the summer, it’s a giant solar oven baking the rest of your house.
A poorly insulated attic means your HVAC system is constantly fighting a losing battle. This is why fixing the attic almost always delivers the biggest and fastest payoff in both comfort and savings.
First, seal the attic floor. Hunt down any gaps around light fixtures, plumbing vents, and especially the attic hatch. Applying some simple weatherstripping to your pull-down stairs is a five-minute job that can have a surprisingly big impact.
Once it’s sealed tight, it’s time for insulation. For most attics, blown-in cellulose or fiberglass is the way to go. It flows into every nook and cranny, creating a thick, seamless thermal blanket. The target for our area is an R-value between R38 and R60, which translates to a depth of about 13 to 18 inches.
A properly sealed and insulated attic can slash your heating and cooling costs by up to 20%. It is hands-down the most impactful energy efficiency project you can tackle.
Addressing Walls in Existing Homes
"But what about my walls?" This is a common question, and the idea of insulating walls in an existing home can feel overwhelming. But modern techniques make it much more manageable than you’d think. If your home was built before the 1980s, there’s a very good chance the wall cavities are completely empty.
The best solution is dense-pack blown-in insulation. Our team drills small, strategically placed holes in your exterior siding, blows insulation into each wall cavity until it's perfectly full, and then patches the holes so you’d never know we were there. This process gives your walls a massive R-value boost without any disruptive interior remodeling.
This is an upgrade that pairs perfectly with other exterior projects. If you’re already planning on getting new siding, that’s the ideal time to add a layer of rigid foam board insulation underneath. This creates a continuous "thermal break," stopping heat from escaping through the wood studs in your walls.
Combine new insulated siding with high-performance windows, and you'll create an incredibly resilient thermal envelope. In fact, the government often incentivizes these smart upgrades. You can find details about the latest ENERGY STAR windows tax credit that can make doing both at once even more affordable.
Don't Forget the Floors and Foundation
Last but not least, look down. If you have a room over an unconditioned garage or a chilly vented crawl space, insulating that floor is a must. Those freezing floors you feel in the winter are a dead giveaway of missing insulation.
Fiberglass batts are a common choice for floors, but the installation has to be perfect. They need to be pressed right up against the subfloor, with no air gaps. For crawl spaces or basements, an even better approach is insulating the foundation walls themselves with rigid foam boards. This helps control moisture and turns the entire space into a semi-conditioned buffer zone, which keeps the floors above it much more comfortable year-round.
Strengthening Your Home's Thermal Envelope
Real home insulation goes way beyond just stuffing fiberglass in your attic. The most effective approach is to think bigger—it’s about creating a complete, unbroken thermal shield around your entire home. To do that, you have to look beyond the interior and start strengthening your home’s exterior envelope.
This is where upgrades like insulated siding and energy-efficient windows become so critical. They aren't just for looks; they are active parts of your home's performance system, working together to stop energy loss right at the source. It's this holistic approach that delivers the biggest, most noticeable improvements in comfort and energy savings.
Stop Thermal Bridging Cold with Insulated Siding
Ever heard of thermal bridging? It’s a sneaky energy thief that’s probably costing you money right now. It happens when heat finds an easy path around your insulation by traveling through the wood studs in your walls. Since wood is a much poorer insulator than, say, fiberglass or foam, it creates a "bridge" for heat to escape.
That’s what makes modern insulated siding a complete game-changer. This isn’t your standard vinyl siding. It’s engineered with a layer of rigid foam insulation that’s permanently bonded to the back of each panel. When we install it, we’re essentially wrapping your home in a continuous blanket of insulation.
This exterior layer is a triple threat:
- It breaks the thermal bridge, stopping heat from leaking out through the wall studs in the winter.
- It blocks solar heat gain during our sweltering Upstate SC summers, giving your air conditioner a much-needed break.
- It adds an impressive layer of durability and impact resistance to your home.
This continuous layer of insulation is one of the most powerful ways to boost your walls' overall R-value without tearing up your drywall. It fixes a fundamental weakness that traditional cavity insulation just can't touch.
The Critical Role of High-Performance Windows
Think about it—your windows are basically big holes in your carefully insulated walls. If you have old, single-pane, or leaky windows, they could be responsible for up to 30% of your home's total heating and cooling loss. That's a staggering amount of waste. Upgrading to modern, energy-efficient replacement windows is one of the smartest exterior improvements you can make.
Today's windows are packed with technology designed specifically to manage heat transfer:
- Low-E Coatings: This is a microscopically thin, transparent metallic coating on the glass. It’s like a bouncer for heat—it reflects infrared heat to keep your home warmer in the winter and blocks it from getting in during the summer.
- Gas Fills: The space between the panes in a double- or triple-pane window is filled with a dense, inert gas like argon or krypton. These gases are far better insulators than plain air, dramatically slowing down heat movement.
When you combine these features, new windows create a powerful barrier that helps keep your indoor temperatures stable all year long. They're a non-negotiable piece of the puzzle for any homeowner serious about insulation.
You can dive deeper into how these units work in our guide on the benefits of energy-efficient windows. Beyond the energy savings, these upgrades also do a fantastic job of reducing outside noise and protecting your furniture and floors from fading.
A Smart Investment That's Gaining Traction
The push for better exterior insulation isn't just a local trend; it's a global shift. The home insulation services market was valued at around USD 58 billion in 2023 and is expected to surge to nearly USD 95 billion by 2032. This growth shows that homeowners everywhere are recognizing the clear link between a well-insulated exterior and lower utility bills, better comfort, and higher home values.
In a competitive market like Upstate South Carolina, these kinds of upgrades make a home stand out. By pairing insulated siding with high-performance windows, you’re not just making an improvement—you’re investing in a robust, high-performance thermal envelope that will pay you back for years to come.
Common Questions About Improving Home Insulation
Even after you've poked around the attic and researched different materials, a few practical questions can still pop up before you start an insulation project. Getting straight answers on costs, whether you can tackle it yourself, and what our local climate demands is that final step to moving forward with confidence. Let's clear up those last-minute hurdles.
How Much Does It Cost to Improve Home Insulation?
The price tag for improving your home's insulation can vary quite a bit. It really boils down to three things: the size of the area, the type of insulation you pick, and whether you're hiring a pro or doing it yourself.
A simple weekend project, like topping up your attic with a few rolls of fiberglass batts, might only set you back a few hundred dollars in materials from the hardware store.
Professional jobs are a different story. Insulating an average-sized attic, for instance, typically runs from $1,500 to $3,500. If you're adding blown-in insulation to existing walls, you might be looking at $1,000 to $2,500. I know the upfront cost can feel like a big number, but it's crucial to think about the return you'll get.
A well-done insulation project can slash your heating and cooling costs by up to 20% every single year. That means the upgrade often pays for itself through serious energy savings. The best way to know the real cost for your home is to get a detailed, no-obligation estimate.
Can I Install Insulation Myself or Should I Hire a Pro?
Ah, the classic DIY-or-hire-a-pro debate. Honestly, it depends. Some insulation jobs are perfect for a handy homeowner, but others really do require professional gear and expertise. Knowing where to draw the line is key to a safe and effective project.
Good DIY Projects:
- Rolling out fiberglass batts in an open and easy-to-get-to attic floor.
- Applying new weatherstripping around your doors and windows.
- Sealing up small air gaps with caulk or a can of spray foam.
Jobs Best Left to the Professionals:
- Applying spray foam insulation. This involves mixing chemicals on-site and requires specialized safety equipment you just can't rent.
- Blowing in loose-fill insulation into an attic or down into walls. You need a commercial-grade blowing machine to get the density just right.
- Installing rigid foam boards on foundation walls or your home's exterior, where every cut and seal has to be perfect.
Hiring a pro isn't just about getting the job done right for the maximum R-value; it's also about safety and having a workmanship warranty to back it all up.
What Is the Right R-Value for My Home in Upstate South Carolina?
R-value is just a way of measuring how well insulation can resist heat trying to move through it—the bigger the number, the better it works. Here in Upstate South Carolina, we're mostly in Climate Zones 3 and 4. That means the U.S. Department of Energy has specific R-value targets for us to get the best energy efficiency.
Hitting these numbers is the most direct way to keep your home comfortable all year and your energy bills from creeping up.
- Attics: You should be aiming for R38 to R60. This is the most important spot in your house and needs a thick layer of insulation, usually somewhere between 13 and 18 inches deep.
- Walls: Target R13 to R15 for the cavities. If you have standard 2x4 framing, this is usually as high as you can go.
- Floors & Crawl Spaces: The recommendation here is R19 to R25. This is what stops you from getting those ice-cold floors in the winter.
When you achieve these R-values, you create a solid thermal envelope around your home that's built for our hot, humid summers and chilly winters.
How Do I Know if My Current Insulation Needs Replacing?
Insulation doesn't have an infinite lifespan. Over the years, it can settle, get wet, or just become less effective. If you're wondering whether yours is still pulling its weight, there are a few tell-tale signs to look for.
The easiest thing to do is a quick visual check. If you look in your attic and the insulation is level with or even below your floor joists, you definitely need to add more. Other red flags are things like water stains, signs of pests (nests, droppings), or insulation that looks compressed and flat.
Your home itself will also give you clues. Are there persistent drafts? Do some rooms feel way colder or hotter than others? Have your energy bills been slowly climbing every year? These are all strong indicators that your insulation is failing. Drafts are especially revealing, which is why you can find more tips in our guide on how to winterize windows and doors to complete your air-sealing strategy. A weak thermal barrier makes your HVAC system work overtime, and replacing that tired, old insulation is the only real fix.