How to Fix Leaking Windows A Practical DIY Guide
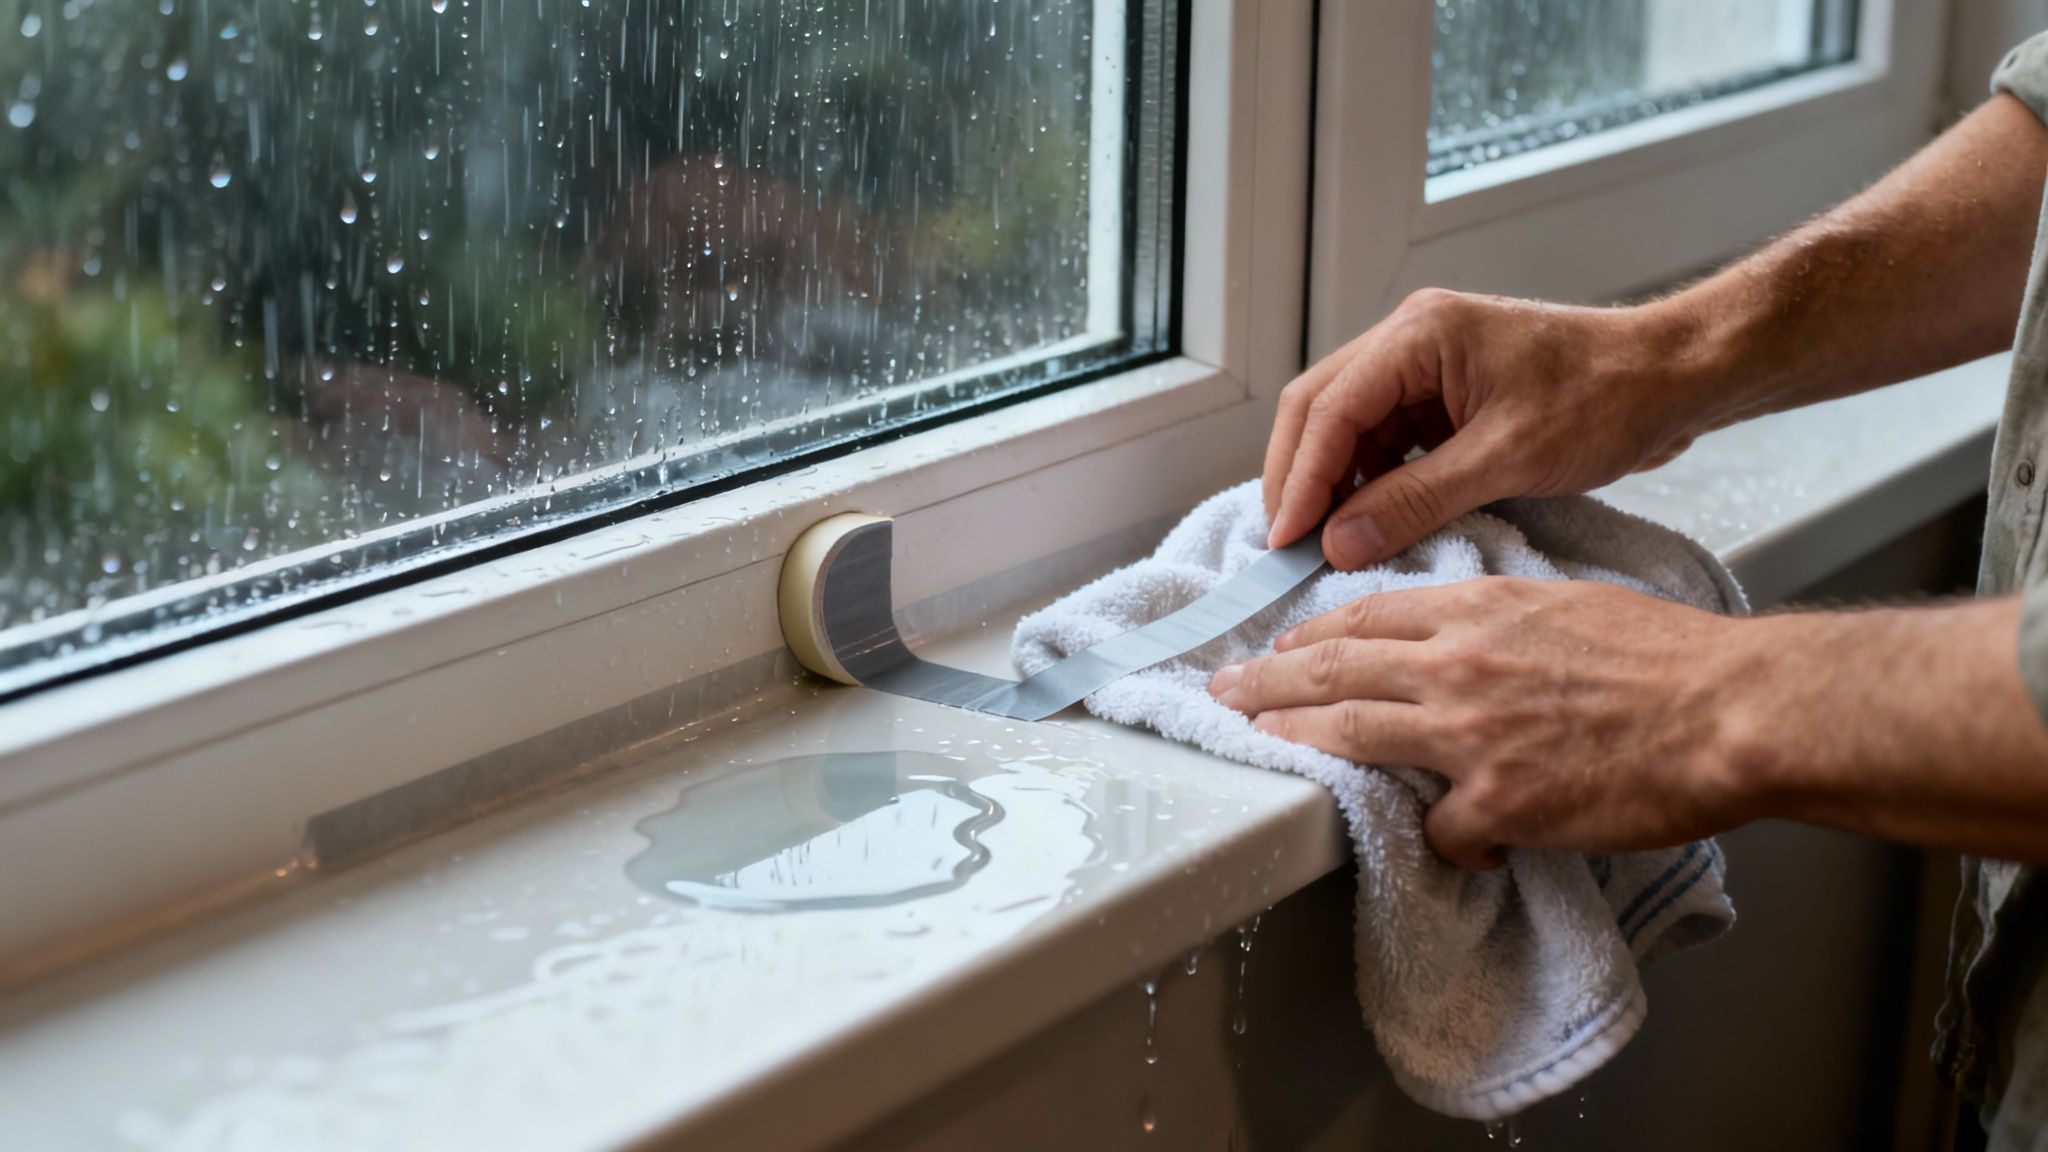
That heart-sinking moment when you spot a puddle on your windowsill or a dark streak snaking down the wall—we’ve all been there. To fix a leaking window, the first order of business is to get the immediate damage under control. Soak up the water, find the most obvious entry point, and slap on a temporary patch with waterproof tape. This quick thinking can stop a minor annoyance from turning into a major, costly repair.
What to Do First When You Find a Leaking Window
Discovering a window leak, especially during one of those heavy Upstate South Carolina downpours, means you need to act fast to keep the damage from spreading. The first few minutes are absolutely critical. Don't panic—just focus on controlling the situation and doing a quick assessment. The goal here is simple: stop more water from getting in and protect your drywall, floors, and furniture.
First, grab some old towels or a bucket to catch the incoming water. Getting that moisture soaked up right away is key to preventing it from seeping into your subfloor or running down inside the wall, which can cause hidden rot and mold growth down the line. Once you've dealt with the puddle, it's time for a quick investigation.
Initial Damage Control and Assessment
Your main goal now is to figure out where the water is getting in. Get up close and inspect the window frame, the seals around the glass, and the wall right next to it. Is the water coming in from the top, the bottom, or the sides? Sometimes, the culprit is an obvious crack in the exterior caulk. Other times, it's a much sneakier gap in the weatherstripping you can barely see.
If it's safe and the storm isn't raging, a quick peek outside can be incredibly revealing. You might find a gutter overflowing right above the window—a super common problem that often gets mistaken for a window failure. It's also worth remembering that water issues near your home's base can sometimes point to bigger drainage problems on your property. Understanding your backyard drainage system can give you a better picture of how water is behaving around your foundation.
To help you make sense of what you're seeing, this quick checklist can point you in the right direction.
Immediate Leak Assessment Checklist
| Water drips from the very top of the frame | The problem is likely above the window—check flashing, siding, or roof. | Look outside (when safe) for clogged gutters or damaged siding right above the frame. |
| Water pools on the interior sill | The seal between the glass and the sash, or the sash and the frame, has failed. | Dry the area completely and apply waterproof tape along the bottom edge of the glass/sash as a temporary fix. |
| Wet spots appear on the wall beside the frame | Water is getting in behind the exterior trim, usually due to failed caulking. | Check the exterior caulk for cracks or gaps. Press a towel against the wet spot inside to absorb moisture. |
| Drafts or moisture between glass panes | The window's thermal seal is broken. This is a sign of window failure, not an active leak. | This isn't an emergency leak but means the window's insulating gas is gone. Plan for a replacement. |
This table should help you triage the situation and take the right first step. Once you've stopped the immediate flow, you can move on to documenting the issue for a more permanent fix.
Documenting the Leak for a Future Fix
With the immediate threat handled, take a minute to gather some evidence. This documentation will be a lifesaver when it comes time for the permanent repair.
Jot down a few notes on these key things:
- Weather Conditions: Was it a light rain, or was it a heavy, driving storm? The wind's direction can force water into weak spots that are otherwise fine.
- Leak Location: Be super specific. Is water coming in at the corner of the sash, along the sill, or from where the top of the frame meets the drywall?
- Visible Damage: Note any cracked paint, discolored drywall, or wood that feels soft around the window. These are tell-tale signs this has been happening for a while.
Pro Tip: Pull out your phone and take clear photos and a short video of the leak while it's happening. Getting footage of exactly where the water is coming in and how much is puddling is gold. This evidence is incredibly useful whether you fix it yourself or call a pro.
This simple act of documenting turns a stressful mess into a fact-finding mission. It helps you diagnose the problem accurately later on and ensures that when you or a professional tackle the repair, you're fixing the root cause, not just slapping a band-aid on a symptom. A temporary patch with duct tape will get you through the storm, but this initial assessment is the first real step toward a permanent solution.
Finding the True Source of Your Window Leak
That little drip you see on the windowsill? It’s often just the symptom, not the disease. Slapping a new bead of caulk where the water shows up is a band-aid fix that almost never lasts. To stop a window leak for good, you have to play detective and trace the water back to its true entry point.

Water is a sneaky traveler. It can get in at the top of a window frame, run down the inside of a wall stud, and only appear at the very bottom. That’s why you can’t assume the leak starts where you see the puddle.
The Usual Suspects Beyond Worn-Out Caulk
Before you get started, it helps to know what you’re looking for. While old caulk is a very common offender, especially after a few hot Upstate South Carolina summers, the real problem is often a bit more hidden.
Here are the most common sources we see in the field:
- Degraded Exterior Caulk: Sun and rain are brutal on caulk. Over time, it gets brittle, cracks, and pulls away from the siding or window frame, creating a perfect entry point for rain.
- Failed Glazing Seals: The putty or rubber seal that holds the glass in the sash can shrink and dry out. This lets water seep in right around the edge of the glass itself.
- Compromised Flashing: This is a big one. The metal strip above your window that’s supposed to direct water away can get damaged or was installed wrong in the first place. This is a classic cause for leaks that appear at the top of the window.
- Clogged Weep Holes: Those tiny slots at the bottom of the window track are there for a reason—to let water out. When they fill with dirt and gunk, water has nowhere to go but inside your house.
These kinds of failures are a primary reason homeowners decide to replace their windows altogether. In fact, the global windows and doors market is projected to hit USD 388.16 billion by 2033, driven largely by the need to replace older, failing units with more durable ones.
How to Run a Controlled Water Test
The only way to be certain where a leak is coming from is to perform a water test. But don’t just blast the window with a pressure washer—that’ll just create a bigger mess. You need two people for this: one outside with a garden hose and one inside spotting for drips.
Set the hose to a gentle spray that mimics a steady rain. Start low, spraying only the windowsill first. Slowly work your way up each side of the frame, then finally across the top. The spotter inside needs to keep a close eye out for the very first sign of moisture.
Key Takeaway: The second you see water appear inside, stop the test. You've found the entry point. Continuing to spray will only cause more damage without giving you any new information.
For tricky leaks, a moisture meter is your best friend. It can detect dampness inside the drywall or wood frame that isn’t visible to the naked eye. If you suspect a hidden problem, learning how to read moisture meter readings can help you confirm the extent of the water intrusion.
What the Visual Clues Are Telling You
Your eyes are your best tool here. During your inspection and water test, look for these telltale signs that point right to the problem.
| Cracked or peeling paint on the windowsill | A slow, persistent leak from a failed seal at the bottom of the glass pane. |
| Dark, discolored streaks on the drywall | Water is getting in behind the window trim, often due to cracked exterior caulk. |
| Shrunken or brittle weatherstripping | The seals designed to stop drafts and water between the sash and frame are no longer effective. |
| Fog or condensation between glass panes | This indicates a broken thermal seal. While not a water leak into your home, it signals total window failure. |
By methodically looking for these clues and carefully testing for the entry point, you can get past the guesswork. An accurate diagnosis is the critical first step to ensuring your fix is a permanent solution, not just another temporary patch.
Gathering Your Essential Window Repair Toolkit
Jumping into a window repair without the right gear is like trying to bake a cake without a mixing bowl—it’s a recipe for frustration and a messy outcome. Before you even think about tackling a leaky window, spending 30 minutes to gather your tools will make the whole job smoother, safer, and a lot more successful.
Think of it as your pre-project checklist. Having everything you need within arm's reach means you won’t be halfway up a ladder when you realize the putty knife is still in the garage.
Core Tools for Any Window Sealing Job
Most basic sealing jobs don't require anything fancy, just a handful of essentials. You probably have most of this stuff already, but it never hurts to double-check.
- A Quality Caulk Gun: Don't skimp here. A good dripless caulk gun is worth the extra few bucks and saves you from that annoying, continuous ooze that gets everywhere.
- Utility Knife & Putty Knife: These are your go-to tools for the most important step: getting rid of the old, failed sealant. A sharp utility knife will slice through it, and a stiff putty knife helps scrape the remnants away cleanly.
- Cleaning Supplies: Grab a small bucket of warm, soapy water, some clean rags, a scrub brush, and either mineral spirits or a dedicated caulk remover. Getting the surface perfectly clean and dry is non-negotiable if you want the new sealant to stick.
Proper prep work accounts for over 70% of a successful sealing job. I've seen it time and again—rushing this part is the number one reason DIY repairs fail within a year. Taking the time to prep your surfaces is a cornerstone of any solid exterior home maintenance checklist.
Choosing the Right Sealant and Materials
Walking down the sealant aisle at the hardware store can feel overwhelming. Picking the wrong one is a classic mistake that practically guarantees you'll be doing this all over again next season. The right choice really just boils down to what your windows are made of.
| Vinyl or Aluminum | 100% Silicone Caulk | Silicone offers fantastic flexibility and bonds great to non-porous surfaces like vinyl and metal. It's totally waterproof and holds up against the sun's UV rays. |
| Wood | Polyurethane Caulk | Polyurethane creates a super strong, durable bond that you can paint to match your trim. It’s perfect for wood, which naturally expands and contracts with the weather. |
For any gaps wider than 1/4 inch, you'll also want to grab some backer rod. This foam rope gets pushed into the gap before you caulk. It not only saves you a ton of caulk but also helps the sealant form the perfect "hourglass" shape, allowing it to stretch and flex without tearing.
A Quick Tip from the Field: Always, always check the expiration date on the caulk tube. Old sealant just doesn't cure right, and it will fail, forcing you to scrape it all out and start from scratch.
Prioritizing Your Safety
Last but certainly not least, don't overlook your own safety, especially if you're going to be on a ladder.
Here's your basic safety kit:
- Safety Glasses: A must-have to protect your eyes from bits of old caulk and debris flying around.
- Work Gloves: A decent pair will protect your hands from scrapes, cuts, and all that sticky sealant.
- A Sturdy Ladder: If you're working on a second-story window, make sure your ladder is on stable, level ground. The rule of thumb is to always maintain three points of contact—two feet and one hand, or one foot and two hands—on the ladder at all times.
With this toolkit ready to go, you're not just prepared to work; you're set up to do a professional-quality repair that will actually last.
A Practical Guide to Sealing Window Leaks
Alright, you’ve done the detective work and have your tools ready. Now it's time to get your hands dirty and make the repair. This is where a little preparation goes a long way, turning what could be a headache into a satisfying weekend project. We'll walk through the three most common fixes that solve the lion's share of window leaks: resealing the exterior, repairing the glazing around the glass, and clearing out those pesky weep holes.
Knowing how to handle these repairs doesn't just save you a service call fee; it protects the value of your home. Picture water sneaking in around a window frame during a classic Greenville downpour—it’s a fast track to wood rot and bigger problems. In fact, the global window market is projected to jump from USD 90.52 billion in 2025 to USD 138.87 billion by 2031, a surge driven by homeowners upgrading to stop leaks and boost efficiency. Many of those expensive replacements start with a simple failed seal you can often fix yourself. You can dig into more industry stats over on IBISWorld.com.
Resealing the Exterior Perimeter
Think of this as your home’s first line of defense against rain. The caulk bead around the outside of your window frame is constantly battling sun and storms. Once it cracks or pulls away, it’s an open invitation for water to seep into your walls.
Your first job is to get all the old caulk off. Seriously, don't just put new caulk over the old stuff. That’s a band-aid fix that’s guaranteed to fail. Grab a utility knife and carefully slice along both sides of the old bead, then use a putty knife or a caulk removal tool to scrape it out completely.
With the old caulk gone, the surface has to be perfectly clean and dry. I use a wire brush for any stubborn bits, then wipe everything down with a rag and some mineral spirits to get rid of any lingering residue. This step is critical—skip it, and your new sealant won't bond properly.
When you're ready to apply the new sealant, cut the tip of your caulk tube at a 45-degree angle, keeping the opening small. Apply steady, even pressure on the caulk gun and lay down one continuous bead. For that smooth, professional look, run a wet finger or a caulk finishing tool over the bead to press it firmly into the joint.
This flowchart lays out the must-have tools for pretty much any window repair.
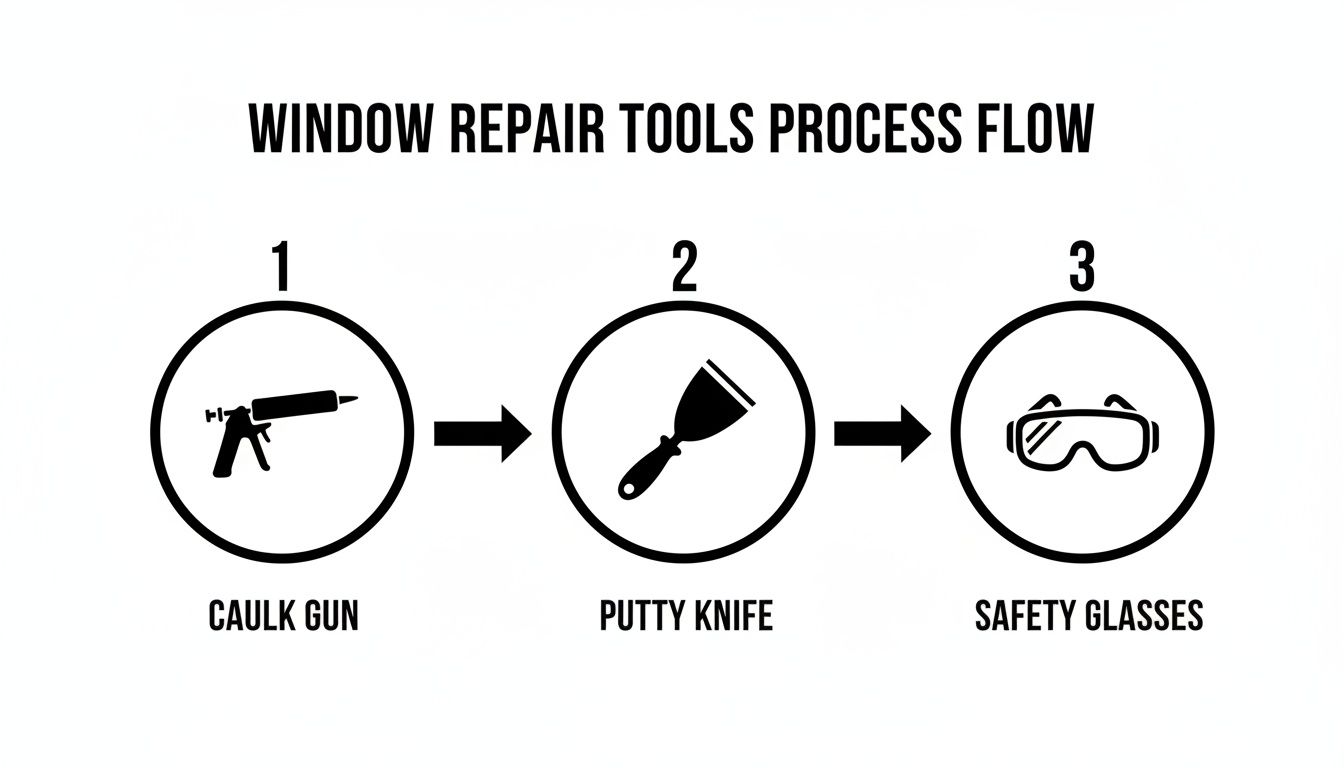
A good caulk gun, a sharp putty knife, and a pair of safety glasses make the job smoother, safer, and give you a much better final result.
Repairing the Window Glazing Seal
If your water test revealed moisture getting in right at the edge of the glass, the glazing seal is your problem. This is the putty or vinyl strip that holds the glass pane in the frame and keeps it weatherproof. Over the years, it gets brittle and starts to crack or shrink.
For older windows with glazing putty, you’ll need to gently chip away the old, dried-up material with a putty knife. Go slow and be careful not to crack the glass. Once it's all removed, clean the channel, apply a new bead of glazing compound, and use your putty knife to press it into place with a clean, angled finish.
Newer windows often have a vinyl or rubber glazing strip instead. For these, you'll have to carefully pry the old, shrunken strip out. I recommend taking a small piece with you to the hardware store to get an exact match. The new strip should press right back into the channel, sometimes with a little help from a dull tool.
A Pro Tip: Caught in a storm with a sudden leak? Grab a roll of waterproof flashing tape for an emergency fix. It's incredibly sticky and will hold strong, buying you time to do a proper repair when the weather clears up.
Clearing Clogged Weep Holes
This is probably the easiest fix of them all, yet it's so often overlooked. Weep holes are those little slots on the exterior bottom of your window frame. Their job is to let any water that gets into the window track drain back outside. But when they fill up with dirt, pollen, or bugs, the water has nowhere to go but into your house.
Here’s how to clear them:
- Find the Holes: Look for the small openings on the outside of your window frame, right at the bottom.
- Poke Out Debris: A straightened paperclip, a small screwdriver, or even a shot of compressed air works great to clear out the gunk.
- Flush and Test: Squirt a little water into the track to make sure it now drains freely through the weep holes.
Once you've stopped the immediate leak, it’s a good time to think about the bigger picture. For long-term solutions and energy efficiency, consider DIY window insulation techniques. These small repairs can also fit into a larger home maintenance strategy, like the one in our guide on how to winterize windows and doors.
Knowing When a DIY Fix Is Not Enough
There’s a real satisfaction in fixing something yourself. Sealing up a minor window leak can be a great weekend project, but one of the most important skills a homeowner can have is knowing when to call it quits. When you're trying to figure out how to fix a leaking window, pushing a DIY solution too far can turn a small water stain into a nightmare repair bill.
Ignoring the warning signs of a serious issue doesn't just waste a Saturday afternoon. It can lead to widespread water damage, dangerous mold growing inside your walls, and even compromise the structural integrity of your home. Recognizing when you’re out of your league is crucial for protecting your property.
Red Flags That Signal a Deeper Problem
A simple tube of caulk has its limits. Some symptoms are clear giveaways that the leak you see is just the tip of the iceberg—a sign of a much bigger, more complex failure. If you spot any of these, it’s time to put down the sealant and pick up the phone.
Keep an eye out for these critical warning signs:
- Soft or Rotting Wood: If the wood on your window frame, sill, or the wall around it feels spongy or crumbles when you press it, you’ve got a long-term moisture problem. Water has been getting in for a while, and the damage is already done.
- Fogging Between Panes: See that hazy condensation trapped between the panes of your double-pane window? That means the airtight thermal seal has failed. This kills your energy efficiency and is a sure sign the window unit itself is at the end of its life.
- Difficulty Opening or Closing: A window that suddenly sticks or becomes a battle to operate often means the frame has absorbed moisture and warped. That swelling puts stress on the entire structure and isn't something a simple repair can fix.
- Visible Mold or a Musty Smell: If you see black or green specks around the window or can't shake a persistent musty odor, you likely have mold growing in the wall cavity. This is a health hazard that requires professional remediation.
These aren't just minor quirks; they're symptoms of a systemic failure. You need a professional to find the root cause, not just patch over the leak you can see.
The Value of a Professional Assessment
When you're dealing with issues like a warped frame or potential rot, a pro brings diagnostic tools and experience that go far beyond what you can see. They use moisture meters to map out just how far water damage has spread inside your walls. They can tell you if the leak is from a busted window seal or a bigger problem with your home’s siding or flashing.
Getting an expert opinion ensures you’re not just chasing symptoms. It gives you a clear path forward, whether that’s a complex repair or a full replacement. For many homeowners facing these serious issues, exploring the benefits of a complete home window replacement often becomes the most sensible and cost-effective long-term solution.
Persistent window leaks are a major force in the home improvement market. Globally, the demand for windows and doors is expected to hit USD 225.83 billion by 2026, driven largely by homeowners replacing old, failing units. Leaks are especially common in sliding windows, which have a 35% higher leak rate because debris builds up in their tracks—an issue affecting about one in five homes each year. You can discover more insights about the windows and doors market on Mordor Intelligence.
Choosing to invest in a high-performance replacement window isn't just about stopping a leak. It’s about upgrading your home's energy efficiency, security, and overall value. A professional installation gives you a perfect, weatherproof seal that a DIY patch on a failing window can never guarantee.
If you see signs of rot, mold, or a broken window seal, the smartest move is to get a professional assessment. It's the only way to be certain you're making the right decision for the long-term health and safety of your home.
Your Top Questions About Fixing Window Leaks
Once you’ve tackled a leak, it’s only natural to have a few more questions. What’s the real cost? How can I stop this from happening again? We get these all the time from homeowners, so let's clear up some of the most common concerns.
How Much Does It Cost to Fix a Leaking Window?
This one’s a classic “it depends” scenario, but I can give you some real-world numbers.
For a simple DIY fix, like running a new bead of high-quality exterior caulk around a single window, you’re looking at maybe $20 to $30 for a tube of sealant and a couple of basic tools. It’s an incredibly affordable first step.
Things get pricier when the problem is more serious. If you need a pro to come out for a failed seal or to patch a small section of rot, that bill could easily range from $150 to over $500. When you start talking about older, drafty, or badly damaged windows, a full replacement often makes the most financial sense. We actually have a whole guide breaking down the costs associated with double-pane window repair and replacement if you want to dive deeper.
Can a Leaking Window Cause Mold?
Absolutely. It’s one of the biggest risks, and it happens more often than people think. Even a slow, sneaky drip creates the perfect damp, dark conditions that mold and mildew love. You’ll usually spot it on the windowsill first, but it can quickly creep into the drywall and the hidden space inside your wall.
Mold isn't just ugly—it's destructive. It can literally eat away at the wood and drywall, causing serious structural issues. More importantly, it can trigger allergies and respiratory problems for your family. If you see any black or green spots or smell that musty odor, deal with the leak immediately and think about calling a mold remediation specialist.
Should I Repair or Replace My Leaking Window?
This is the million-dollar question. The answer really comes down to the window's age and just how bad the damage is. If you've got a newer window with a simple issue like a cracked caulk seam, a repair is a no-brainer. It's cheap, fast, and can give that window many more years of service.
But sometimes, a replacement is the smarter long-term play. Here's when to make that call:
- Age: If the window is over 15 years old, its seals and moving parts are probably on their last legs anyway.
- Seal Failure: Seeing fog or condensation trapped between the panes of glass? That's a tell-tale sign the insulating gas has escaped, and your window's energy efficiency is shot.
- Major Damage: A rotting frame, a warped sash that won't close properly, or multiple seal failures are all signs that the window is structurally compromised.
In these situations, a new window doesn't just stop the leak—it’s a major upgrade to your home's energy efficiency, security, and curb appeal.
A new, professionally installed window solves the leak for good and often pays for itself over time through lower energy bills. It’s an investment in your home's health and your peace of mind.
How Can I Prevent Future Window Leaks?
A little proactive maintenance goes a long way. Think of it as a cheap insurance policy against some seriously expensive headaches.
Inspect Your Seals Twice a Year: Every spring and fall, do a quick walk-around and look at the exterior caulk on all your windows. Check for cracks, gaps, or any spots where the sealant is pulling away from the frame.
Keep Weep Holes Clear: Those little slots at the bottom of the window frame are called weep holes. Their job is to let water drain out. Use a paperclip or a small brush to make sure they aren't clogged with dirt or insects.
Check Your Gutters: Clogged gutters are a huge culprit. When they overflow, water just pours down your walls and has no trouble finding its way into window frames.
Making these simple checks a routine will help you catch small issues before they become big, wet problems.
When a simple repair isn't enough and you're facing wood rot or a failing window, it's time to call in the experts. For homeowners in Upstate South Carolina, Atomic Exteriors offers high-performance replacement windows and professional installation to solve leaks permanently and enhance your home's value. Schedule your free, no-obligation estimate today!