A Homeowner's Guide on How to Prevent Basement Flooding
Preventing a flooded basement isn't about one magic bullet—it's about creating layers of defense. It starts with managing water on the outside, shoring up your foundation, and having a reliable backup plan for any water that gets inside. Think of it as a complete system: proper yard grading, clean gutters, sealed cracks, and a trusty sump pump all working together.
Your Essential Blueprint for a Dry Basement
That damp, musty smell in your basement is more than just unpleasant. It’s a warning flare. It’s telling you there’s a problem that could threaten your home's foundation, your family's health, and your property value.
The key is to tackle the problem with a clear strategy, one that deals with water at every possible entry point. We'll start outside and work our way in. Forget those long, overwhelming checklists; the best way to prevent basement flooding is to build a smart, layered defense.
This approach boils down to three core areas:
- Exterior Water Management: This is your first and most important line of defense. It’s all about controlling rainwater and runoff before it ever has a chance to touch your foundation.
- Foundation Integrity: Your foundation walls are the only thing standing between a dry basement and tons of water-saturated soil. Sealing up any cracks or weak spots is non-negotiable.
- Interior Defense Systems: Let's be realistic—sometimes water finds a way. For those moments, you need a system inside to collect that water and get it out of your house, fast.
A Three-Tiered Protection Strategy
The most effective basement waterproofing plans never rely on a single solution. They're a combination of exterior fixes and interior safeguards working in harmony. I like to think of it like defending a castle: you have a moat (your grading and gutters), strong walls (your sealed foundation), and guards inside (your sump pump). Each layer makes the others stronger.
This diagram shows how the whole system flows, starting with the outside and ending with your interior failsafe.
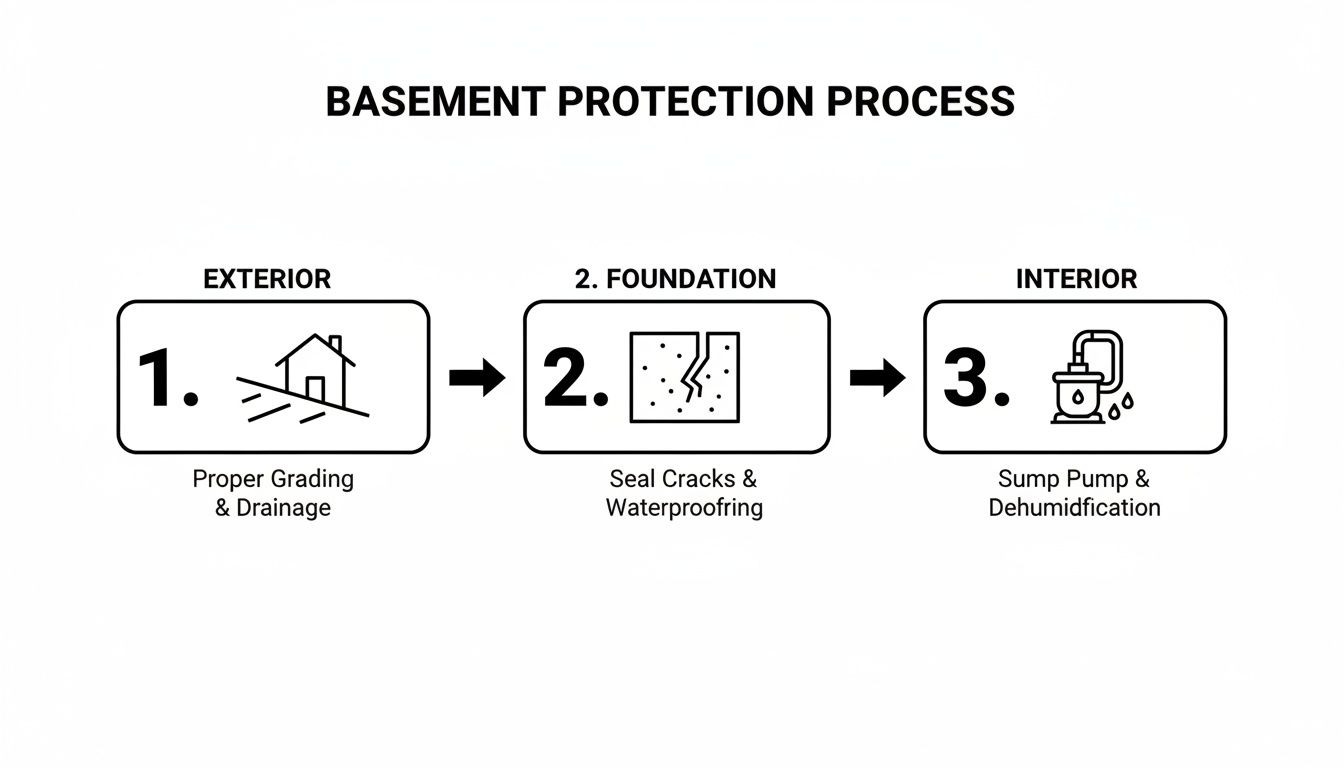
As you can see, it all begins with being proactive on the outside, then fortifying the foundation itself, and finally, installing a reliable backup plan inside.
And the need for a plan like this is very real. Some studies show that approximately 98% of basements in the U.S. will eventually deal with water damage of some kind. That number alone shows why a prevention plan isn't just a "nice-to-have"—it's a core part of owning a home.
To help you get started, here’s a quick-reference guide to the most common issues we see and the most effective ways to fix them.
Prioritizing Your Basement Flood Prevention Efforts
| Improper Yard Grading | Exterior Water Management | Regrade the soil to slope at least 6 inches over the first 10 feet away from your foundation. |
| Clogged/Overflowing Gutters | Exterior Water Management | Clean gutters twice a year and install downspout extensions to discharge water at least 10 feet away. |
| Foundation Cracks | Foundation Integrity | Seal visible cracks in foundation walls and floors with epoxy or polyurethane injections. |
| High Water Table | Interior Defense Systems | Install a sump pump with a battery backup to actively pump out groundwater that collects. |
| Window Well Leaks | Exterior Water Management | Install window well covers and ensure the wells have proper gravel drainage at the bottom. |
Focusing on these high-impact areas will give you the most bang for your buck and dramatically reduce your risk of a flooded basement.
A dry basement is the result of a system, not a single product. It’s about controlling water from the moment it hits your property until it’s safely away from your home's foundation.
Part of your blueprint is understanding the tools of the trade. For instance, it's crucial to know exactly what a sump pump is and why you need one. This single device is often the last, and most important, line of defense.
When you pair an interior system like that with strong exterior defenses—like high-performance gutters—your home becomes much more resilient. You can get a head start by checking out our guide on the best gutters for heavy rain and begin building your exterior defenses today.
Mastering Exterior Water Management
The best way to keep your basement dry has nothing to do with what’s inside your basement. It all starts outside, in your yard.
Think of it this way: you can either fight water once it's already pressing against your foundation, or you can simply tell it where to go in the first place. By managing the water on your property, you create a powerful, proactive defense that sends rainwater safely away from your home.
This isn't just about cleaning your gutters. It’s about building an entire system that takes control of every drop of rain from the moment it hits your roof or lawn.

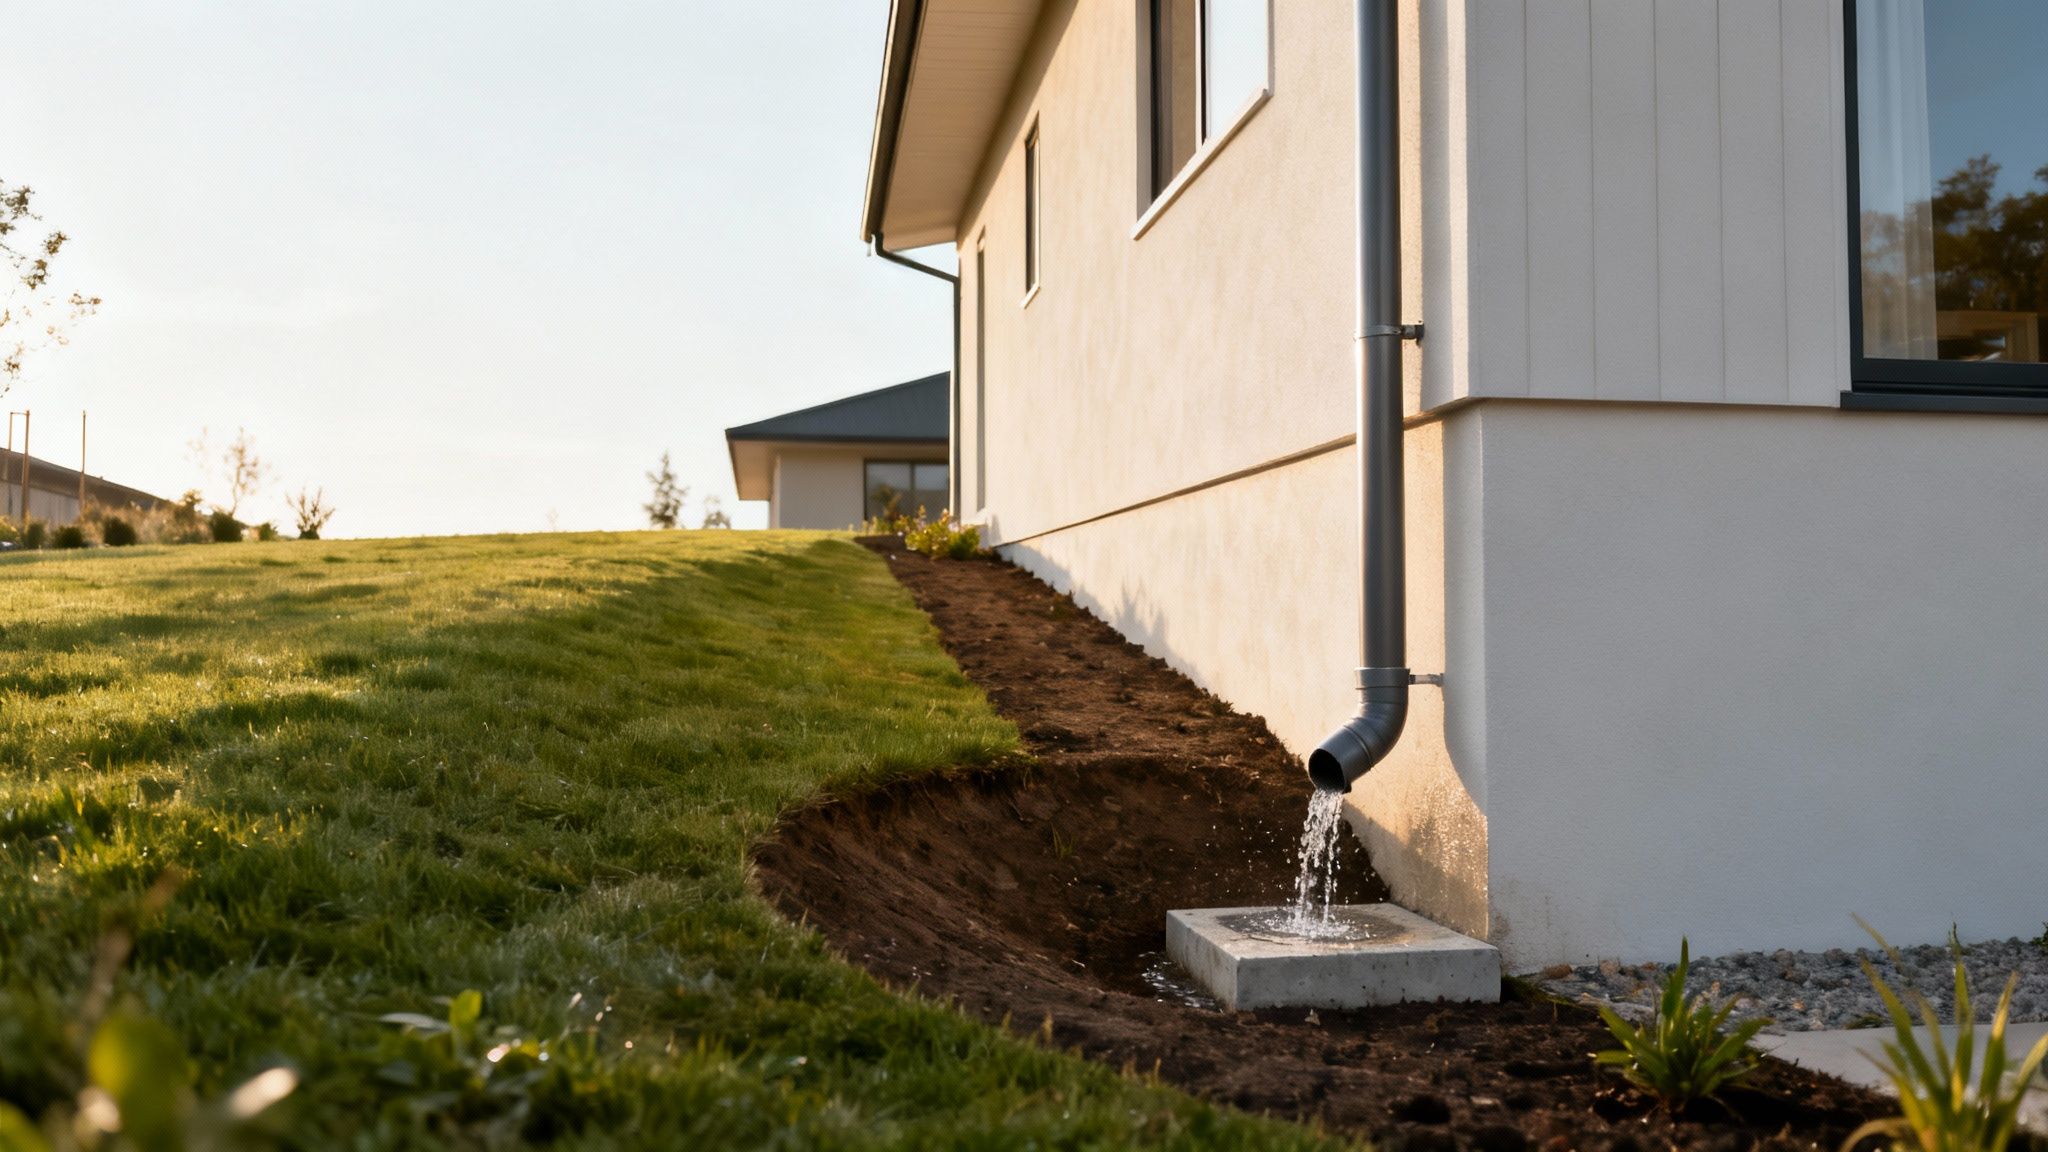
The Critical Role of Proper Landscape Grading
More often than not, a wet basement can be traced back to one simple problem: the ground around the house is too flat, or worse, it slopes toward the foundation.
When this happens, you’ve essentially built a small moat around your home. Every time it rains, water pools against your basement walls, saturating the soil and creating immense hydrostatic pressure. That pressure is relentless, and it will find a way to push moisture through even the smallest cracks.
The fix is to establish a positive grade—a noticeable slope that directs water away from your house on all sides.
As a rule of thumb, you want the ground to drop at least six inches over the first ten feet out from your foundation. It’s a gentle slope, but it’s more than enough to encourage water to flow away with gravity.
You can check your grading yourself with a line level and a few stakes. If you find low spots, the solution is often as simple as bringing in some compactable fill dirt to build up the area around the foundation. This single fix can fundamentally change how your property handles a downpour and is a cornerstone of preventing basement flooding.
Optimizing Your Gutters and Downspouts
Your roof is a massive water collector. A typical 1,500-square-foot roof will shed nearly 1,000 gallons of water during a single one-inch rainfall. Your gutter system is the only thing standing between that torrent and your foundation.
If your gutters fail, all that water gets dumped exactly where you don't want it, completely canceling out any work you’ve done on grading.
A system that truly works isn't just about having gutters; it's about having the right gutters that are kept in top shape.
- Cleanliness is Key: Clogged gutters are worthless. If they're full of leaves and gunk, water just sheets over the side and soaks the ground below. Plan on cleaning them twice a year, once in late spring and again after the leaves fall.
- Size and Pitch Matter: Gutters need to be sized for your roof area and sloped correctly toward the downspouts. If not, water will just sit there instead of draining.
- Downspout Extensions Are Non-Negotiable: This is one of the biggest and most common mistakes we see. A downspout that ends right at the foundation is a recipe for disaster. You must use extensions to carry that water at least five to ten feet away.
A simple splash block is better than nothing, but a proper pipe extension that moves water far into the yard—or connects to a drainage system—is the real solution for keeping your foundation from getting saturated.
Failing to manage this runoff isn't a small risk. The price of flooding is skyrocketing, with events like Hurricane Harvey causing an estimated $125 billion in damage and Hurricane Ida causing around $95 billion. You can read more about what it takes to recover from a flood at Ecohome.net.
Protecting Vulnerable Entry Points
Even with perfect grading and gutters, some parts of your home are natural weak spots. Window wells are a classic example. They are literally just holes dug next to your foundation, ready to fill up with rain, leaves, and mud.
To protect them, make sure each well has a good layer of gravel at the bottom for drainage and, more importantly, a sturdy cover. A good window well cover keeps out debris and sheds rainwater away from your basement windows.
Take a walk around your foundation and look for other entry points, too. Gaps around utility lines—where the gas, water, or electrical service enters the house—are direct pathways for water. Sealing these penetrations with a high-quality, exterior-grade caulk is a quick but critical fix.
By focusing your energy on these exterior fixes, you’re stopping water at the source. You’re solving the problem before it ever begins, which is always smarter and cheaper than dealing with the aftermath of a flood. For those who need to take water management to the next level, our guide on installing a backyard drainage system is a great next step.
Fortifying Your Basement from the Inside
Even if you’ve done everything right on the outside, a determined downpour or a rapid snowmelt can still find a way in. The water table rises, pressure builds, and suddenly your exterior defenses are under serious threat. This is exactly why your interior defense system isn't just a "backup plan"—it's an active, essential layer of protection for when water gets a little too close for comfort.
Think of it this way: your exterior work is like securing the perimeter of your property. Your interior strategy is the guard posted right at the door. This system is designed to intercept and eject any water that slips through tiny cracks or gets pushed in by hydrostatic pressure before it has a chance to ruin your day.
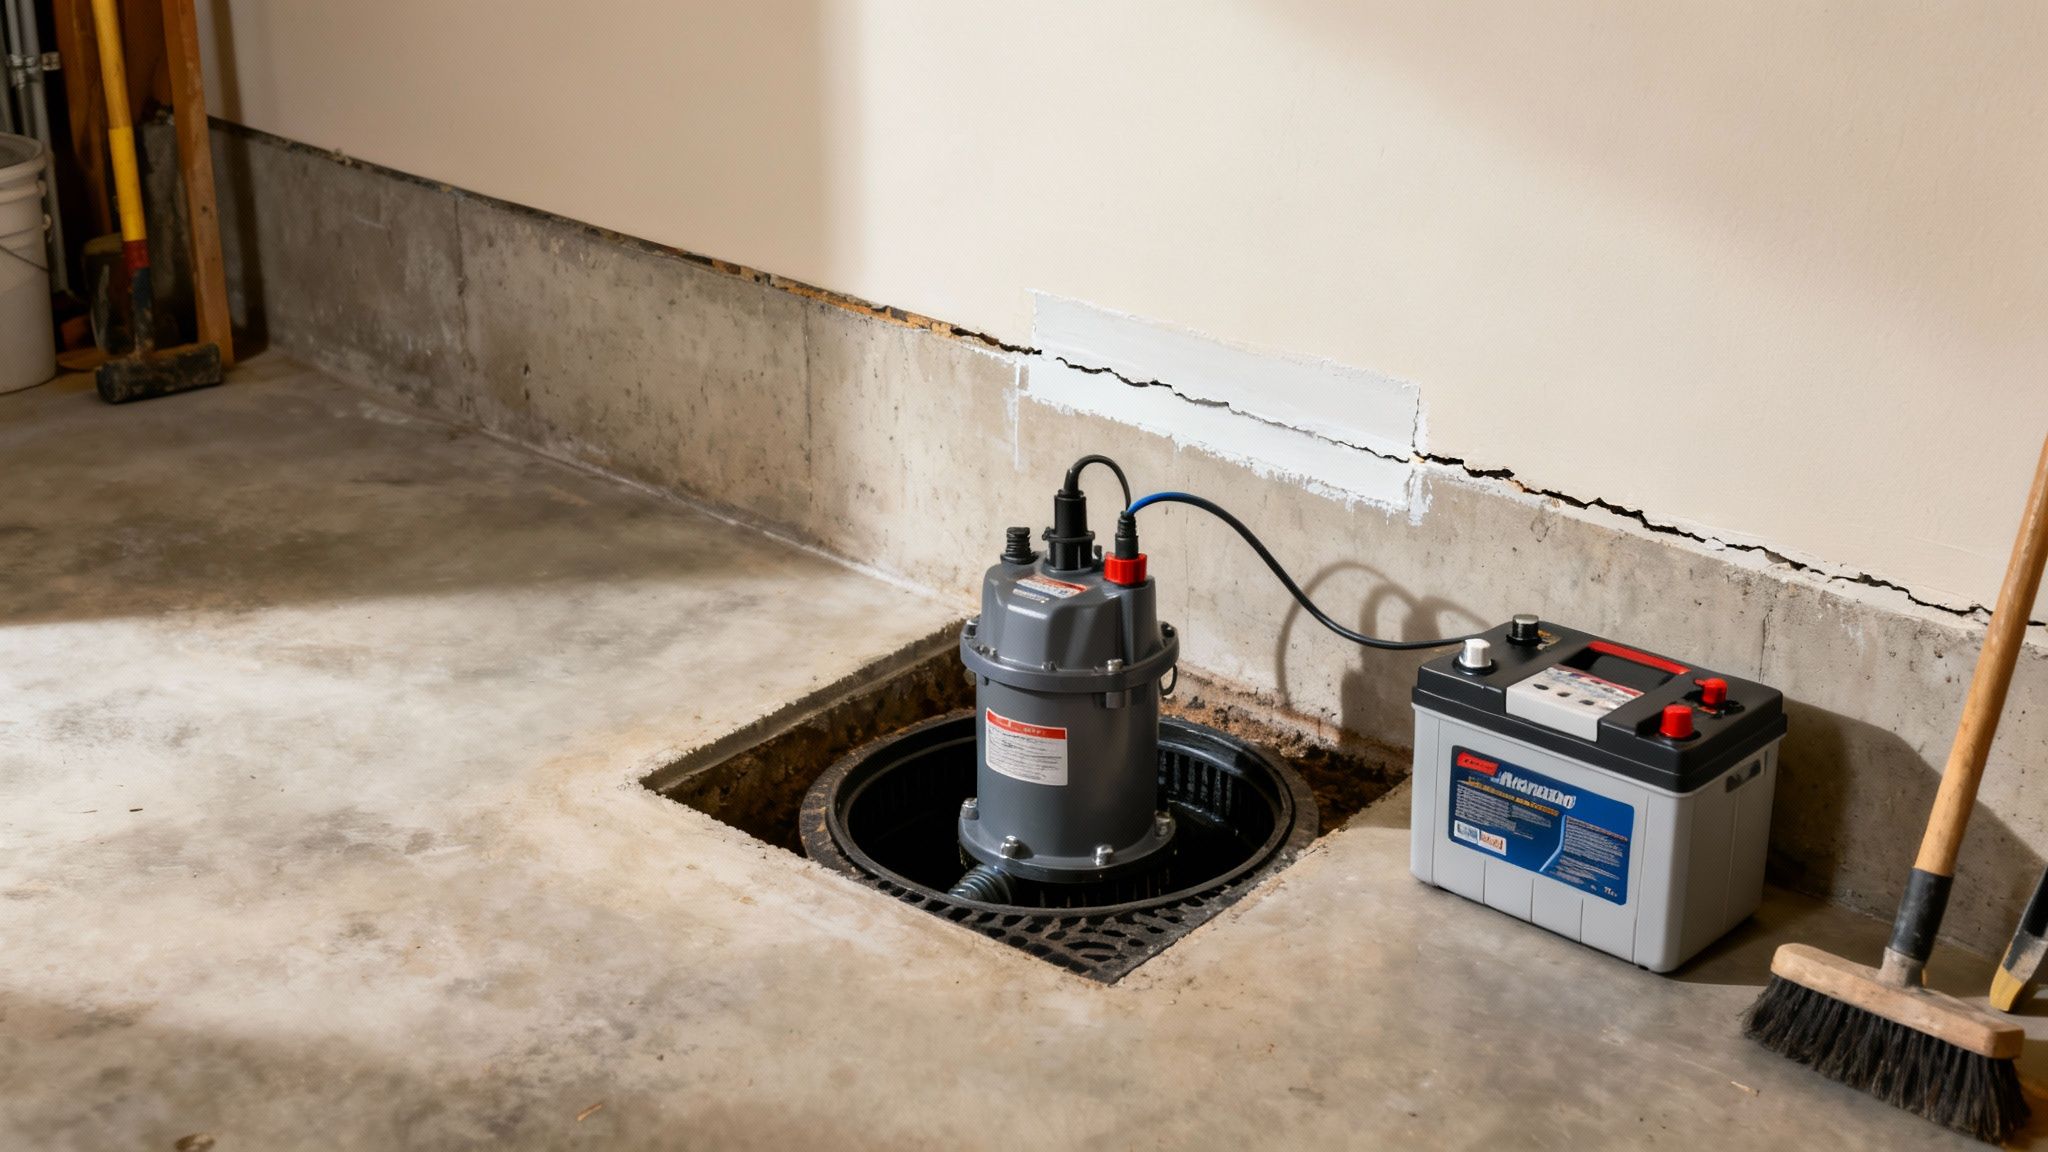
The Sump Pump: Your Unseen Guardian
The single most important piece of equipment in your interior arsenal is the sump pump. This is a submersible pump that sits in a basin, called a sump pit, installed at the lowest point of your basement. As groundwater seeps into the pit and rises, a float switch triggers the pump, which then kicks on and forcefully pumps the water out and away from your home.
A reliable sump pump is often the only thing standing between a minor inconvenience and thousands of dollars in flood damage. But they aren't all created equal.
- Horsepower (HP): For most homes, a 1/3 HP pump does the job just fine. But if you're in an area with a high water table or known for heavy storms, upgrading to a 1/2 HP model gives you the extra muscle to move more gallons per minute when it really counts.
- Switch Type: Vertical float switches tend to be more dependable in smaller sump pits. Tethered switches need more room to swing and can sometimes get snagged on the side of the basin.
- Construction: Go for cast iron. It's far more durable and dissipates heat better than plastic models, meaning it will have a much longer service life.
The most critical part of any sump pump setup is a battery backup. Your main pump runs on electricity—the first thing to go out in a nasty storm. A battery backup system senses the power failure and automatically takes over, keeping your basement dry for hours until the grid comes back online.
Sealing Cracks and Gaps
Water is incredibly opportunistic. It doesn't need a wide-open door; a hairline crack in your foundation wall or floor is an open invitation. The hydrostatic pressure from water-logged soil outside will push moisture through these tiny fissures, causing anything from persistent dampness to a full-blown leak.
Take a good, hard look at your basement walls and floor. Pay special attention to the corners and the joint where the wall meets the floor. Also, check around any pipes or electrical conduits coming through the foundation.
- For thin cracks (under 1/8 inch): A good-quality polyurethane caulk can do a surprisingly effective job of sealing these from the inside.
- For larger or structural cracks: These need something stronger. Professionals use epoxy or polyurethane foam injection, which expands to fill the entire crack from the inside out, creating a permanent, waterproof bond.
Plugging these gaps is a huge step. For a truly fortified basement, exploring professional basement waterproofing services can give you a permanent solution against water intrusion.
Interior Drainage Systems
Sometimes, especially in homes with chronic water issues from a high water table, just sealing cracks won't cut it. When water is constantly pressing against your foundation, you need a way to manage it, not just block it. That’s where an interior drainage system—often called a French drain—comes in.
This system is pretty clever. It works by collecting water right where it most often enters: the cove joint, which is the seam where the basement wall and floor meet. A perforated pipe is laid in a small trench that runs along the inside perimeter of your basement floor. This pipe catches any water seeping through and channels it straight to the sump pit to be pumped away.
It doesn't stop water from getting through the foundation wall, but it gives it a controlled path to follow. By directing the water to the sump pump, it never has a chance to spread across your floor. It’s an incredibly effective—though more involved—fix for keeping a basement dry for good.
Your Proactive Homeowner Maintenance Plan
Keeping your basement dry isn't a "set it and forget it" kind of deal. It's an ongoing commitment, a routine you build to protect your home. The best way I've found to tackle it is with a simple, season-by-season maintenance schedule.
This approach helps you catch the small stuff—a clogged downspout, a bit of settled soil—before it spirals into a catastrophic, wallet-draining failure. It turns defense into a habit, ensuring you're always ready for whatever the next big storm throws your way.
Let's break down what you should be doing as the seasons change.
Spring Readiness Checklist
Once the ground thaws and the spring rains start, your home's water management systems face their biggest test of the year. This is prime time for water issues, so you need to be extra vigilant.
- Inspect Gutters and Downspouts: Winter can be rough on gutters, causing them to sag, pull away, or spring leaks. Give them a good visual inspection and clear out any gunk left over from fall. You want that water flowing freely. For a deeper dive, our guide has detailed steps on how to clean your gutters safely.
- Test Your Sump Pump: Don't wait for a flood to discover your pump is dead. Seriously. Just pour a bucket of water into the sump pit. You want to see the float switch activate, hear the pump kick on, and watch it successfully push the water out.
- Check Your Grading: Walk the perimeter of your house. See any low spots where the soil has settled over the winter? That's a welcome mat for water. Fill those areas with compactable dirt to make sure the ground is sloping away from your foundation again.
Summer And Fall Preparations
Mid-year maintenance is all about staying on top of things and getting ready for the autumn leaf dump. Think of it as a crucial transition period before winter locks everything down.
After the spring pollen and "helicopter" seeds have done their thing, give your gutters another quick check. This stops clogs from forming and baking solid in the summer sun, which makes them a nightmare to remove later.
Then comes fall. The main event here is leaf management. A single mature oak tree can drop over 500,000 leaves, and a shocking number of them will aim right for your gutters. Cleaning them out after most of the leaves have fallen is absolutely non-negotiable. It's your best defense against ice dams and overflows.
Pro Tip: While you're up on the ladder cleaning the gutters, take a minute to scan your roof. Look for any shingles that are missing, curled, or damaged. Those are weak spots that could let water right into your home's structure.
Winter Watchfulness
Winter brings its own unique set of challenges. When the ground is frozen solid, it can't absorb melting snow, which creates dangerous runoff right when you least expect it.
- Keep Downspouts Clear: It’s easy for snow and ice to plug up the end of your downspout extensions. Keep them clear so water from a sudden roof melt has a path to escape far away from your foundation.
- Monitor Window Wells: Shovel heavy snow away from your foundation and window wells. This prevents a massive amount of water from soaking the ground right next to your basement when a warm spell hits.
- Check for Ice Dams: Those thick ridges of ice at the edge of your roof are a major red flag. They can force water to back up under your shingles and leak into your attic and walls. If you see them forming, it's often a sign of an insulation or ventilation problem that needs a professional eye.
Year-Round Basement Protection Maintenance Schedule
Turning this daunting task into a simple routine is the secret to success. This table breaks down your year-round plan into manageable, seasonal checks.
| Spring | Inspect & clean gutters. Test sump pump. Check foundation grading. | Don't just test the pump—listen to it. A new, strange noise could be an early warning sign of a failing motor. |
| Summer | Do a quick gutter check after pollen/seed season. Trim overgrown shrubs near the foundation. | Pruning bushes improves airflow, helping the soil and foundation stay drier after a summer rainstorm. |
| Fall | Perform a thorough gutter cleaning after leaves fall. Inspect the roof for damaged shingles. | Consider installing gutter guards. They won't eliminate maintenance entirely, but they'll drastically reduce the frequency of full clean-outs. |
| Winter | Keep downspout outlets clear of snow & ice. Shovel deep snow away from window wells. | During a mid-winter thaw, take a quick walk around your house to ensure water is still draining away properly and not ponding. |
By staying ahead of the weather with a simple plan like this, you empower yourself to prevent basement flooding. It's hands-down one of the smartest investments a homeowner can make to protect their home's value and integrity.
Knowing When to DIY and When to Call an Expert
Tackling a home improvement project yourself can be incredibly rewarding. But when it comes to keeping your basement dry, knowing your limits is just as important as knowing your way around a toolbox.
Some tasks are perfect for a weekend warrior, while others carry serious risks if they aren't handled by a seasoned professional. Making the wrong call can do more than just waste a Saturday afternoon—a botched repair can actually make a flooding problem worse, turning a minor issue into a major disaster.
Straightforward DIY Waterproofing Tasks
Let's start with the high-impact jobs you can absolutely tackle with basic tools and a bit of effort. These are your first line of defense, focusing on simple maintenance and easy fixes that make a huge difference.
Getting these right often comes down to consistency. Do them regularly, and you'll save money while gaining a much better understanding of how water behaves around your property.
- Gutter and Downspout Maintenance: This is a big one. Regularly cleaning out leaves and debris ensures thousands of gallons of roof water are channeled safely away from your foundation, not dumped right next to it. Also, make sure your downspouts extend at least five to ten feet from your home.
- Applying Interior Sealants: Noticing some minor dampness or a few hairline cracks in your basement walls? Applying a good waterproof sealant is a great project. A quality masonry waterproofing paint can create an effective moisture barrier on the inside surface of your foundation.
- Basic Landscape Grading: If you spot a small low spot right next to your foundation, you can often correct it yourself. Grab a few bags of compactable fill dirt and build up the area to create a gentle slope away from the house. It's a simple, effective fix.
- Installing Window Well Covers: This is probably one of the easiest and fastest ways to stop a common source of leaks. Securely fitting covers over your window wells keeps rain, leaves, and debris from collecting and seeping into your basement.
Investing your time in these preventative DIY tasks is one of the smartest financial decisions a homeowner can make. The payoff for proactive maintenance is enormous compared to the cost of emergency repairs after a flood.
When to Bring in a Professional
While those DIY fixes are valuable, some problems demand the skill, tools, and experience of a professional waterproofing contractor. Attempting these jobs yourself can easily lead to structural damage, failed systems, and even more severe water intrusion down the road.
These aren't just complex jobs; they're critical infrastructure for your home's health.
- Serious Foundation Crack Repair: We’re not talking about tiny hairline cracks. If you see cracks wider than 1/8 of an inch, horizontal cracks, or "stair-step" patterns in your masonry, that’s a red flag for structural issues. A pro will use high-pressure epoxy or polyurethane foam injection to permanently seal these from the inside out, truly bonding the crack.
- Sump Pump Installation or Replacement: This is way more involved than it looks. It means breaking up concrete, digging a pit to the right depth, setting the pump, and running discharge plumbing. Get any step wrong, and the pump could fail right when you need it most.
- Installing an Interior Drainage System: A French drain or drain tile system is a major undertaking. It requires cutting out a perimeter trench in your concrete floor, laying perforated pipe, and connecting it all to a sump pump. This is a job that demands absolute precision.
- Major Landscape Regrading: If your entire yard slopes toward your house, a few bags of dirt won't cut it. A professional can use specialized equipment to properly regrade the property, sometimes installing exterior drains to manage heavy water flow for good.
The Real Cost of a Failed DIY Project
Trying to DIY a complex job to save a few bucks can backfire, big time. The investment in proper flood protection is proven to yield massive returns by preventing future damage. Global research from the World Resources Institute shows that for every $1 spent on flood protection infrastructure, countries can avoid up to $248 in damages. You can dig into the data yourself at WRI.org.
When you hire a licensed and insured contractor like Atomic Exteriors, you're not just paying for labor. You're investing in expertise, commercial-grade materials, and a warranty that guarantees the work is done right. A perfect example is your gutter system—it’s the kind of job where professional work ensures long-term performance and peace of mind. You can learn more about our professional gutter repair and installation services to see what a difference it makes.
Common Questions About Basement Flooding
Diving into basement waterproofing can feel a bit overwhelming. From figuring out costs to trying to understand insurance fine print, it's easy to get lost. Most homeowners we talk to are wondering the same things: Is this little bit of dampness a big deal? What's this really going to cost me?
To clear things up, we've pulled together straight-up answers to the questions we hear every single day.
How Much Does It Cost to Waterproof a Basement?
This is almost always the first question, and the honest answer is: it really depends. The price tag for keeping your basement dry is tied directly to what’s causing the problem in the first place and which solution fits best.
- Simple DIY Fixes: If you're just sealing a few minor cracks or applying some waterproof paint yourself, you might only be out a few hundred dollars for materials.
- Sump Pump Installation: Getting a professional to install a quality sump pump system is a game-changer for many homes. You're typically looking at a range of $600 to $1,800, which covers the pump, basin, and all the labor.
- Interior Drainage System: For more stubborn water issues, an interior French drain is the next level of defense. Depending on how big your basement is, this can run between $3,000 and $7,000.
- Exterior Waterproofing: This is the big one. It involves digging all the way down to your foundation's footing to apply a waterproof membrane. Because it’s so labor-intensive, costs can range from $9,000 to $15,000 or even more.
A friendly piece of advice: a high-performance gutter system is often the single most cost-effective place to start. Getting rainwater away from your foundation can solve the root problem for a fraction of what those other, more intensive methods cost.
Does Homeowners Insurance Cover Basement Flooding?
This is a huge one, and it catches a lot of people by surprise. The short answer is almost always no. Your standard homeowners insurance policy is designed for water damage from inside your house, like a burst pipe or a washing machine that goes haywire.
It does not cover damage from water coming in from the outside, like overland flooding from a monster rainstorm. For that kind of protection, you need a separate flood insurance policy, usually from the National Flood Insurance Program (NFIP) or a private carrier. The best thing you can do is call your agent and get a clear "yes" or "no" on exactly what your policy covers.
My Basement Is Only a Little Damp. Do I Need to Worry?
Yes. One hundred percent, yes. That little bit of dampness, that musty smell you can't quite place, or that chalky white powder on the concrete walls (that’s called efflorescence, by the way) are all red flags.
It might not be a full-on flood, but that chronic moisture is the perfect breeding ground for much bigger problems down the road.
Ignoring it can lead to:
- Mold and Mildew Growth: This isn't just gross; it can be a serious health risk for your family.
- Wood Rot: The dampness slowly destroys floor joists, support beams, and wall framing.
- Foundation Damage: Constant moisture will eventually degrade the concrete and mortar holding your home up.
Fixing a small moisture problem now is always, always cheaper and less of a headache than a massive mold remediation or structural repair project later. Often, the fix is as simple as making sure your gutters are doing their job perfectly. A small component like a gutter apron can make a world of difference. To see what I mean, you can learn what a gutter apron is and how it directs water away from your home's edge.
Dealing with the small stuff today is how you prevent a disaster tomorrow.
When you're ready to make sure your home's exterior is giving you the best defense possible, the team at Atomic Exteriors is here to help. Give us a call for a free, no-pressure estimate on a high-performance seamless gutter system.